

Historic Baltimore County home needs energy & Comfort Uprade
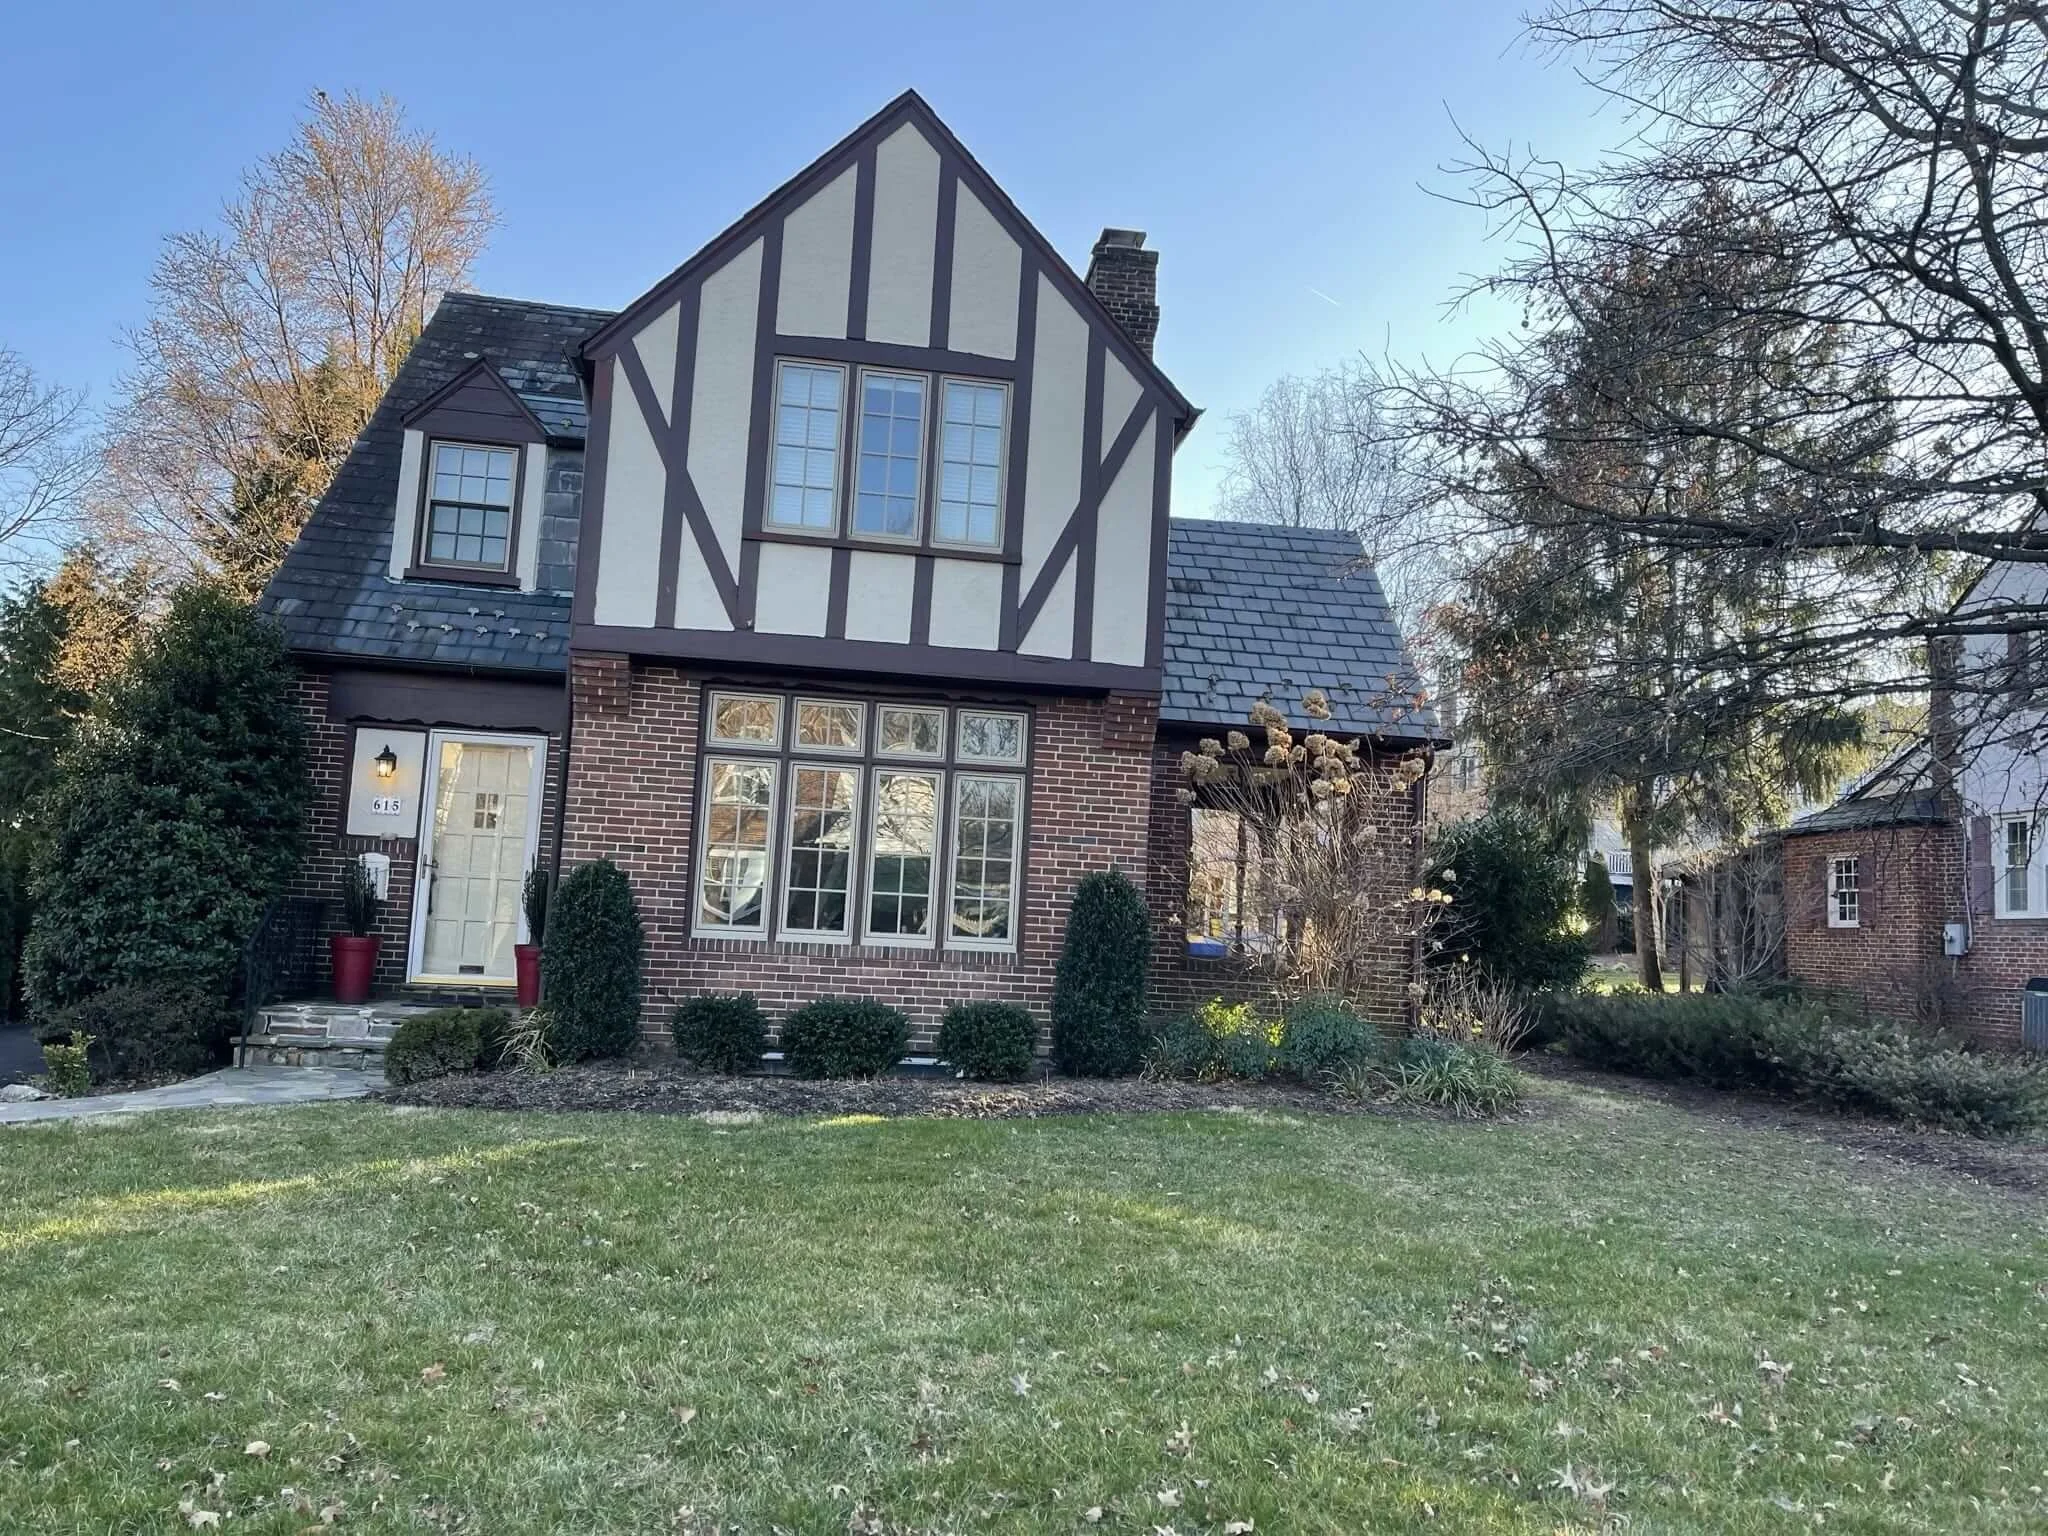
About: Single homeowner requested an energy audit in order to address high winter bills, cold second floor bedrooms as well as a cold back living room. The home was built in 1935 with a first and second floor addition in the back built in 2005.

After an exterior inspection, the above floor plan was made. The uncomfortable areas are within the addition so inspecting these areas will be of high importance.

A 12 month chart listing the home's energy performance can be seen above. Clearly, the customer prefers to have the cooling temperature set quite high in the summer as their electricity (left) usage during this time for a home of this size is noticeably low. The red flags are on the gas (right) side which indicates that the home has problems either producing or containing heat after taking into account the temperature setting.
The entire home is heated by a boiler from (age, picture) with separate AC systems (both four years old) servicing the first and second floors.
The water heater is gas-powered, 17 years old, and is vented atmospherically.
The below concerns and opportunities for improvement were found after a thorough inspection of the customer’s attic.
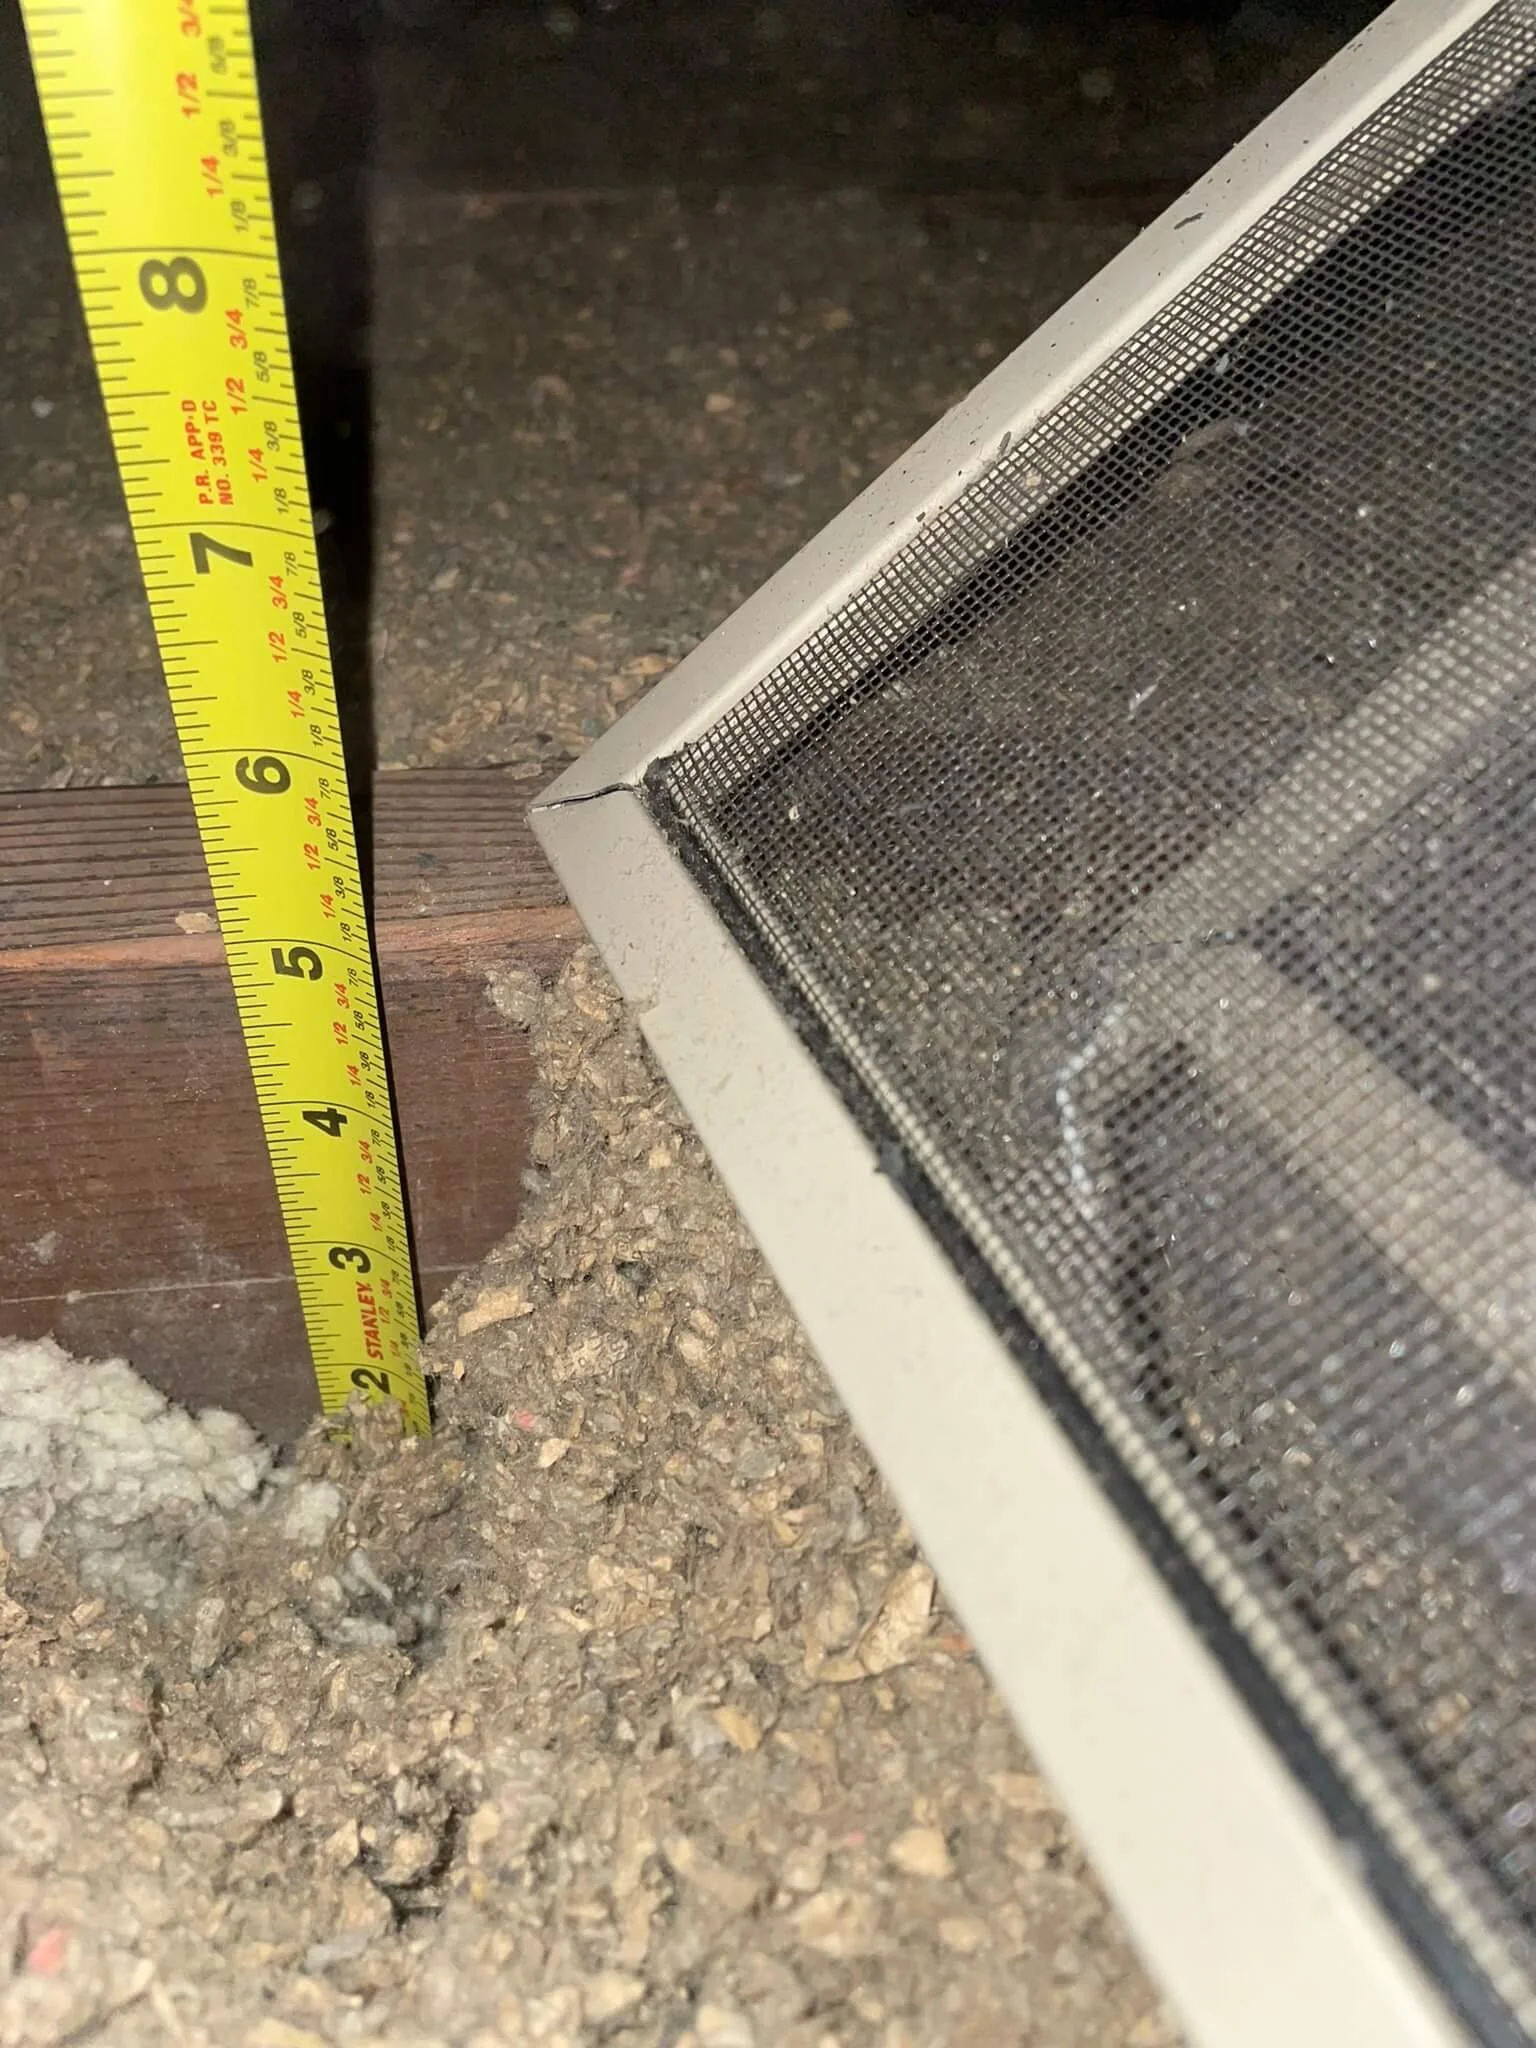
The attic section above the original home has only five inches of cellulose insulation on the attic floor. This is insufficient to effectively hold conditioned air within the home and is directly contributing to high bills and discomfort. Considering the age of the home the insulation was peeled away for signs of vermiculate (asbestos) underneath. None was found.
A large internal wall gap connected to the attic is allowing excessive heat to escape.

The top picture shows the master bathroom fan and the bottom picture shows it exhausting above the air handler. This is an unfortunately common health/safety issue as the shower moisture is being transferred to the attic where it can create mold/mildew. None was found. This should be addressed by venting it directly to the outside through the roof or gable wall.
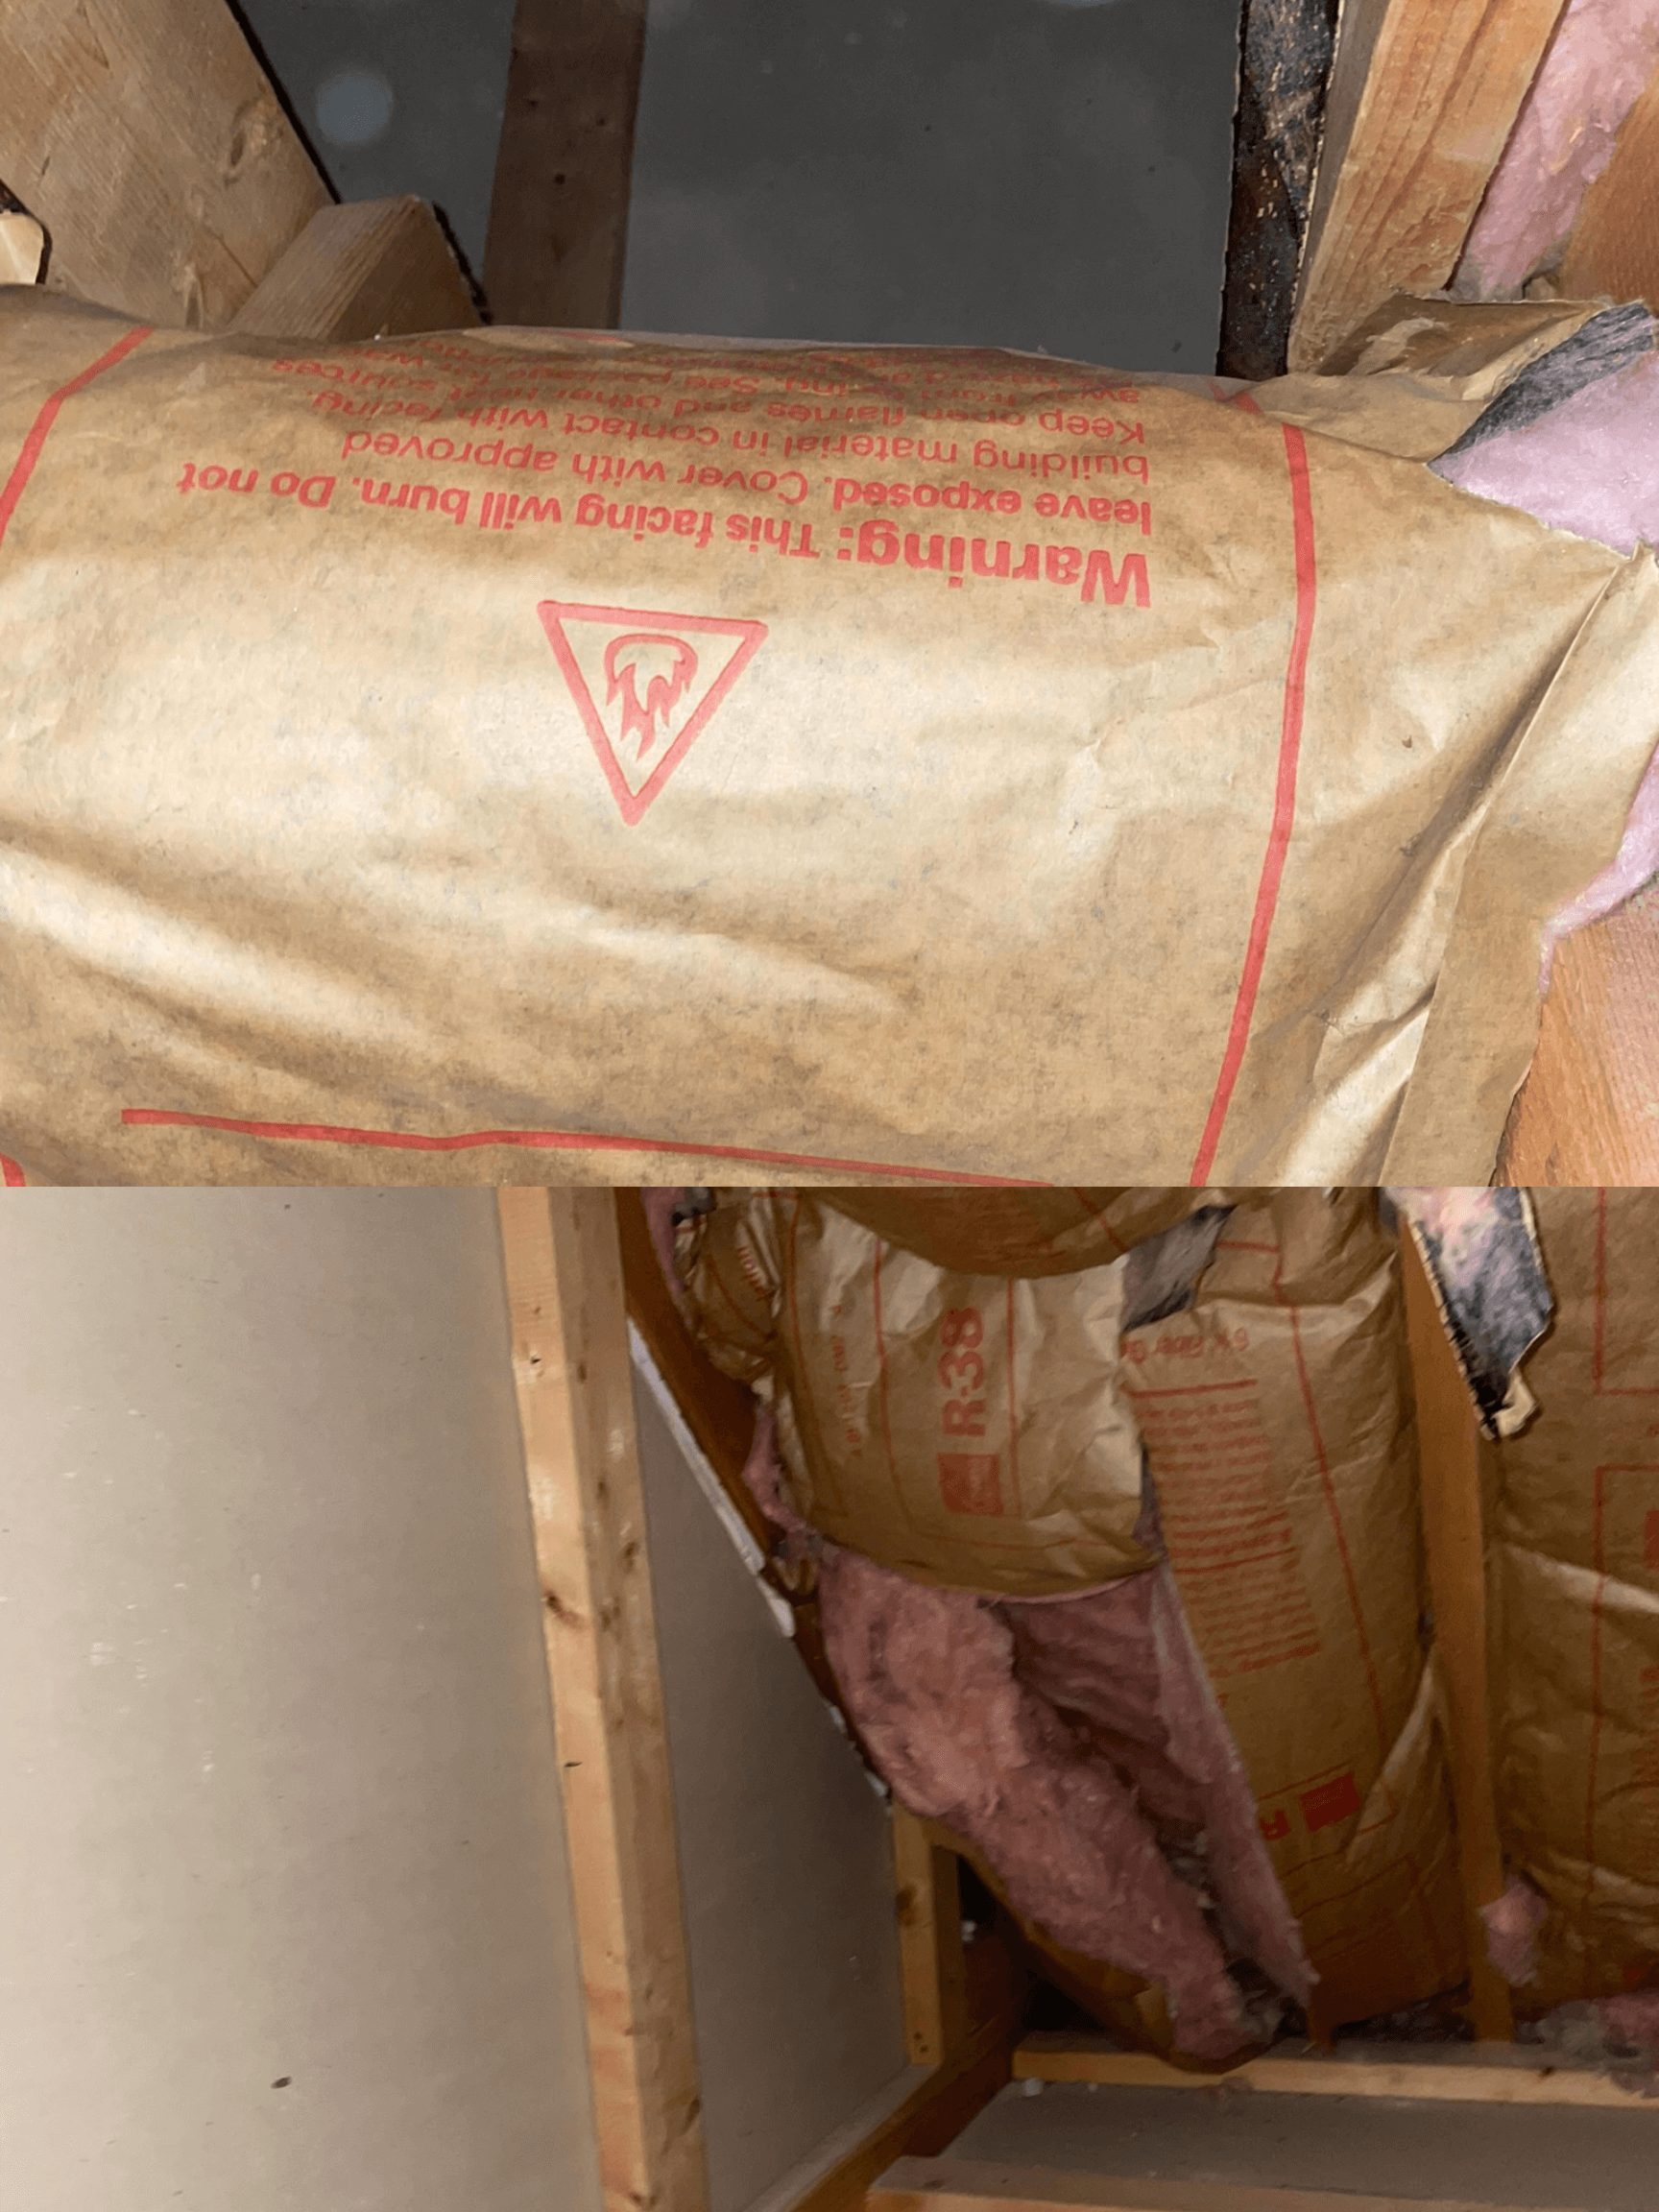
The above pictures show what is called a misaligned thermal barrier. The insulation is not installed at the drywall but instead at the framing several feet away. This greatly reduces its ability to hold heat which leads to higher bills and creates discomfort in the second floor guest bedroom which is above where these pictures were taken.
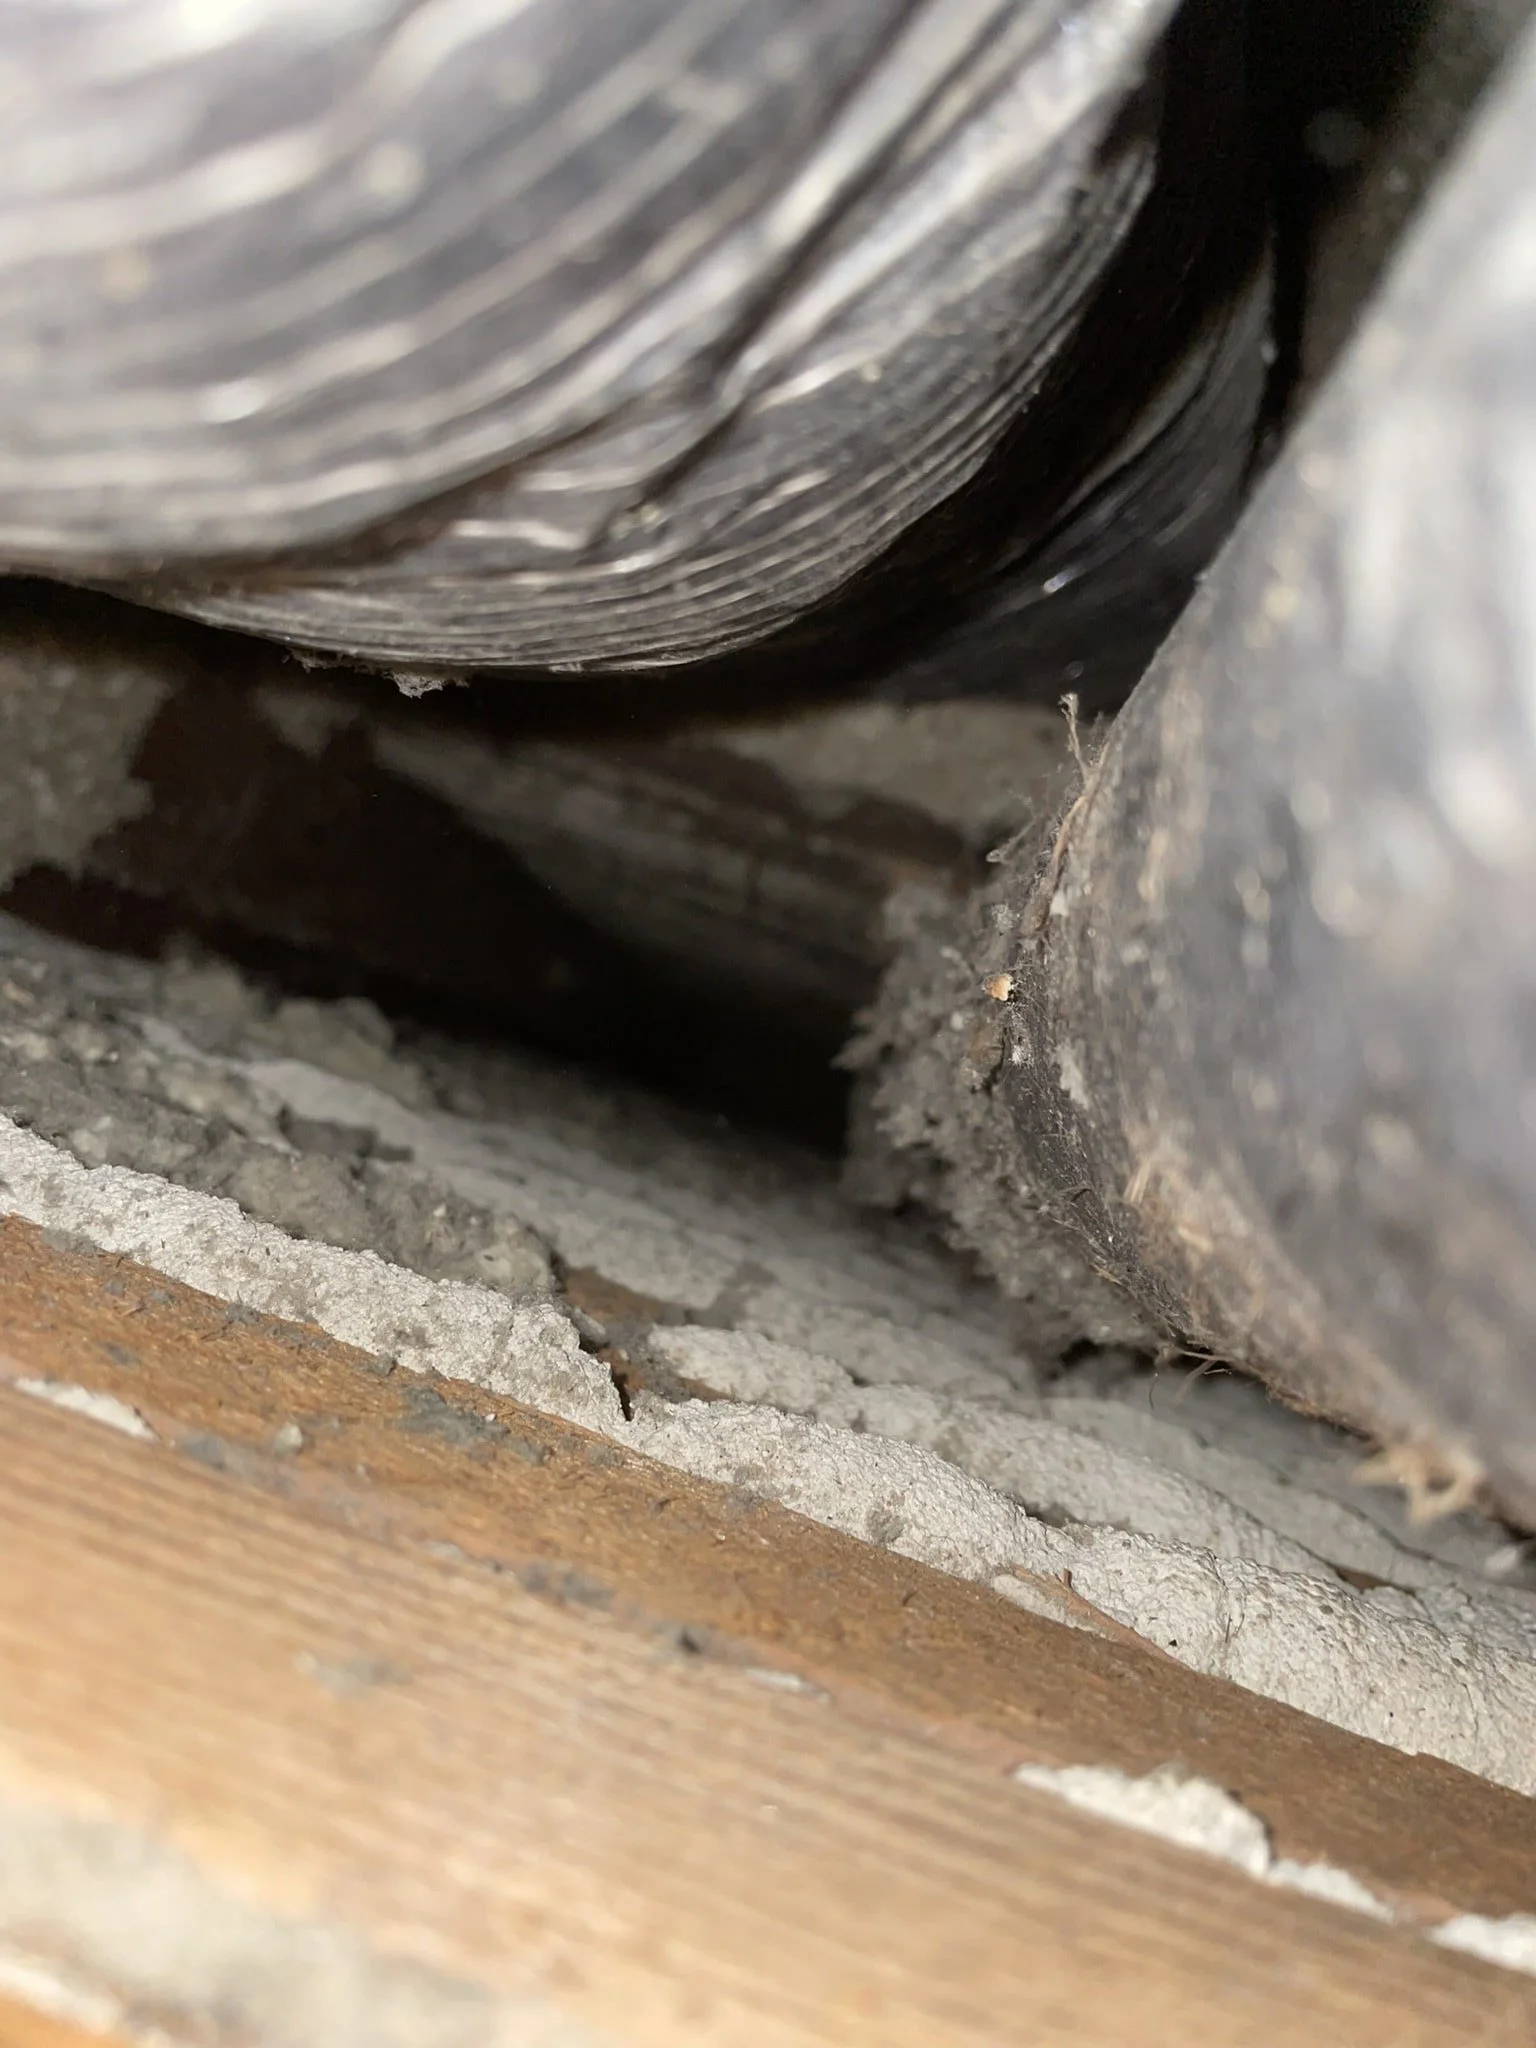
The above picture shows where the original roofline meets the addition. The bottom picture shows a very large gap between the interior walls after a piece of insulation was moved. This large opening is allowing air to escape and insulation is ineffective to solve this problem.
Missing insulation was found at the master bedroom knee wall.
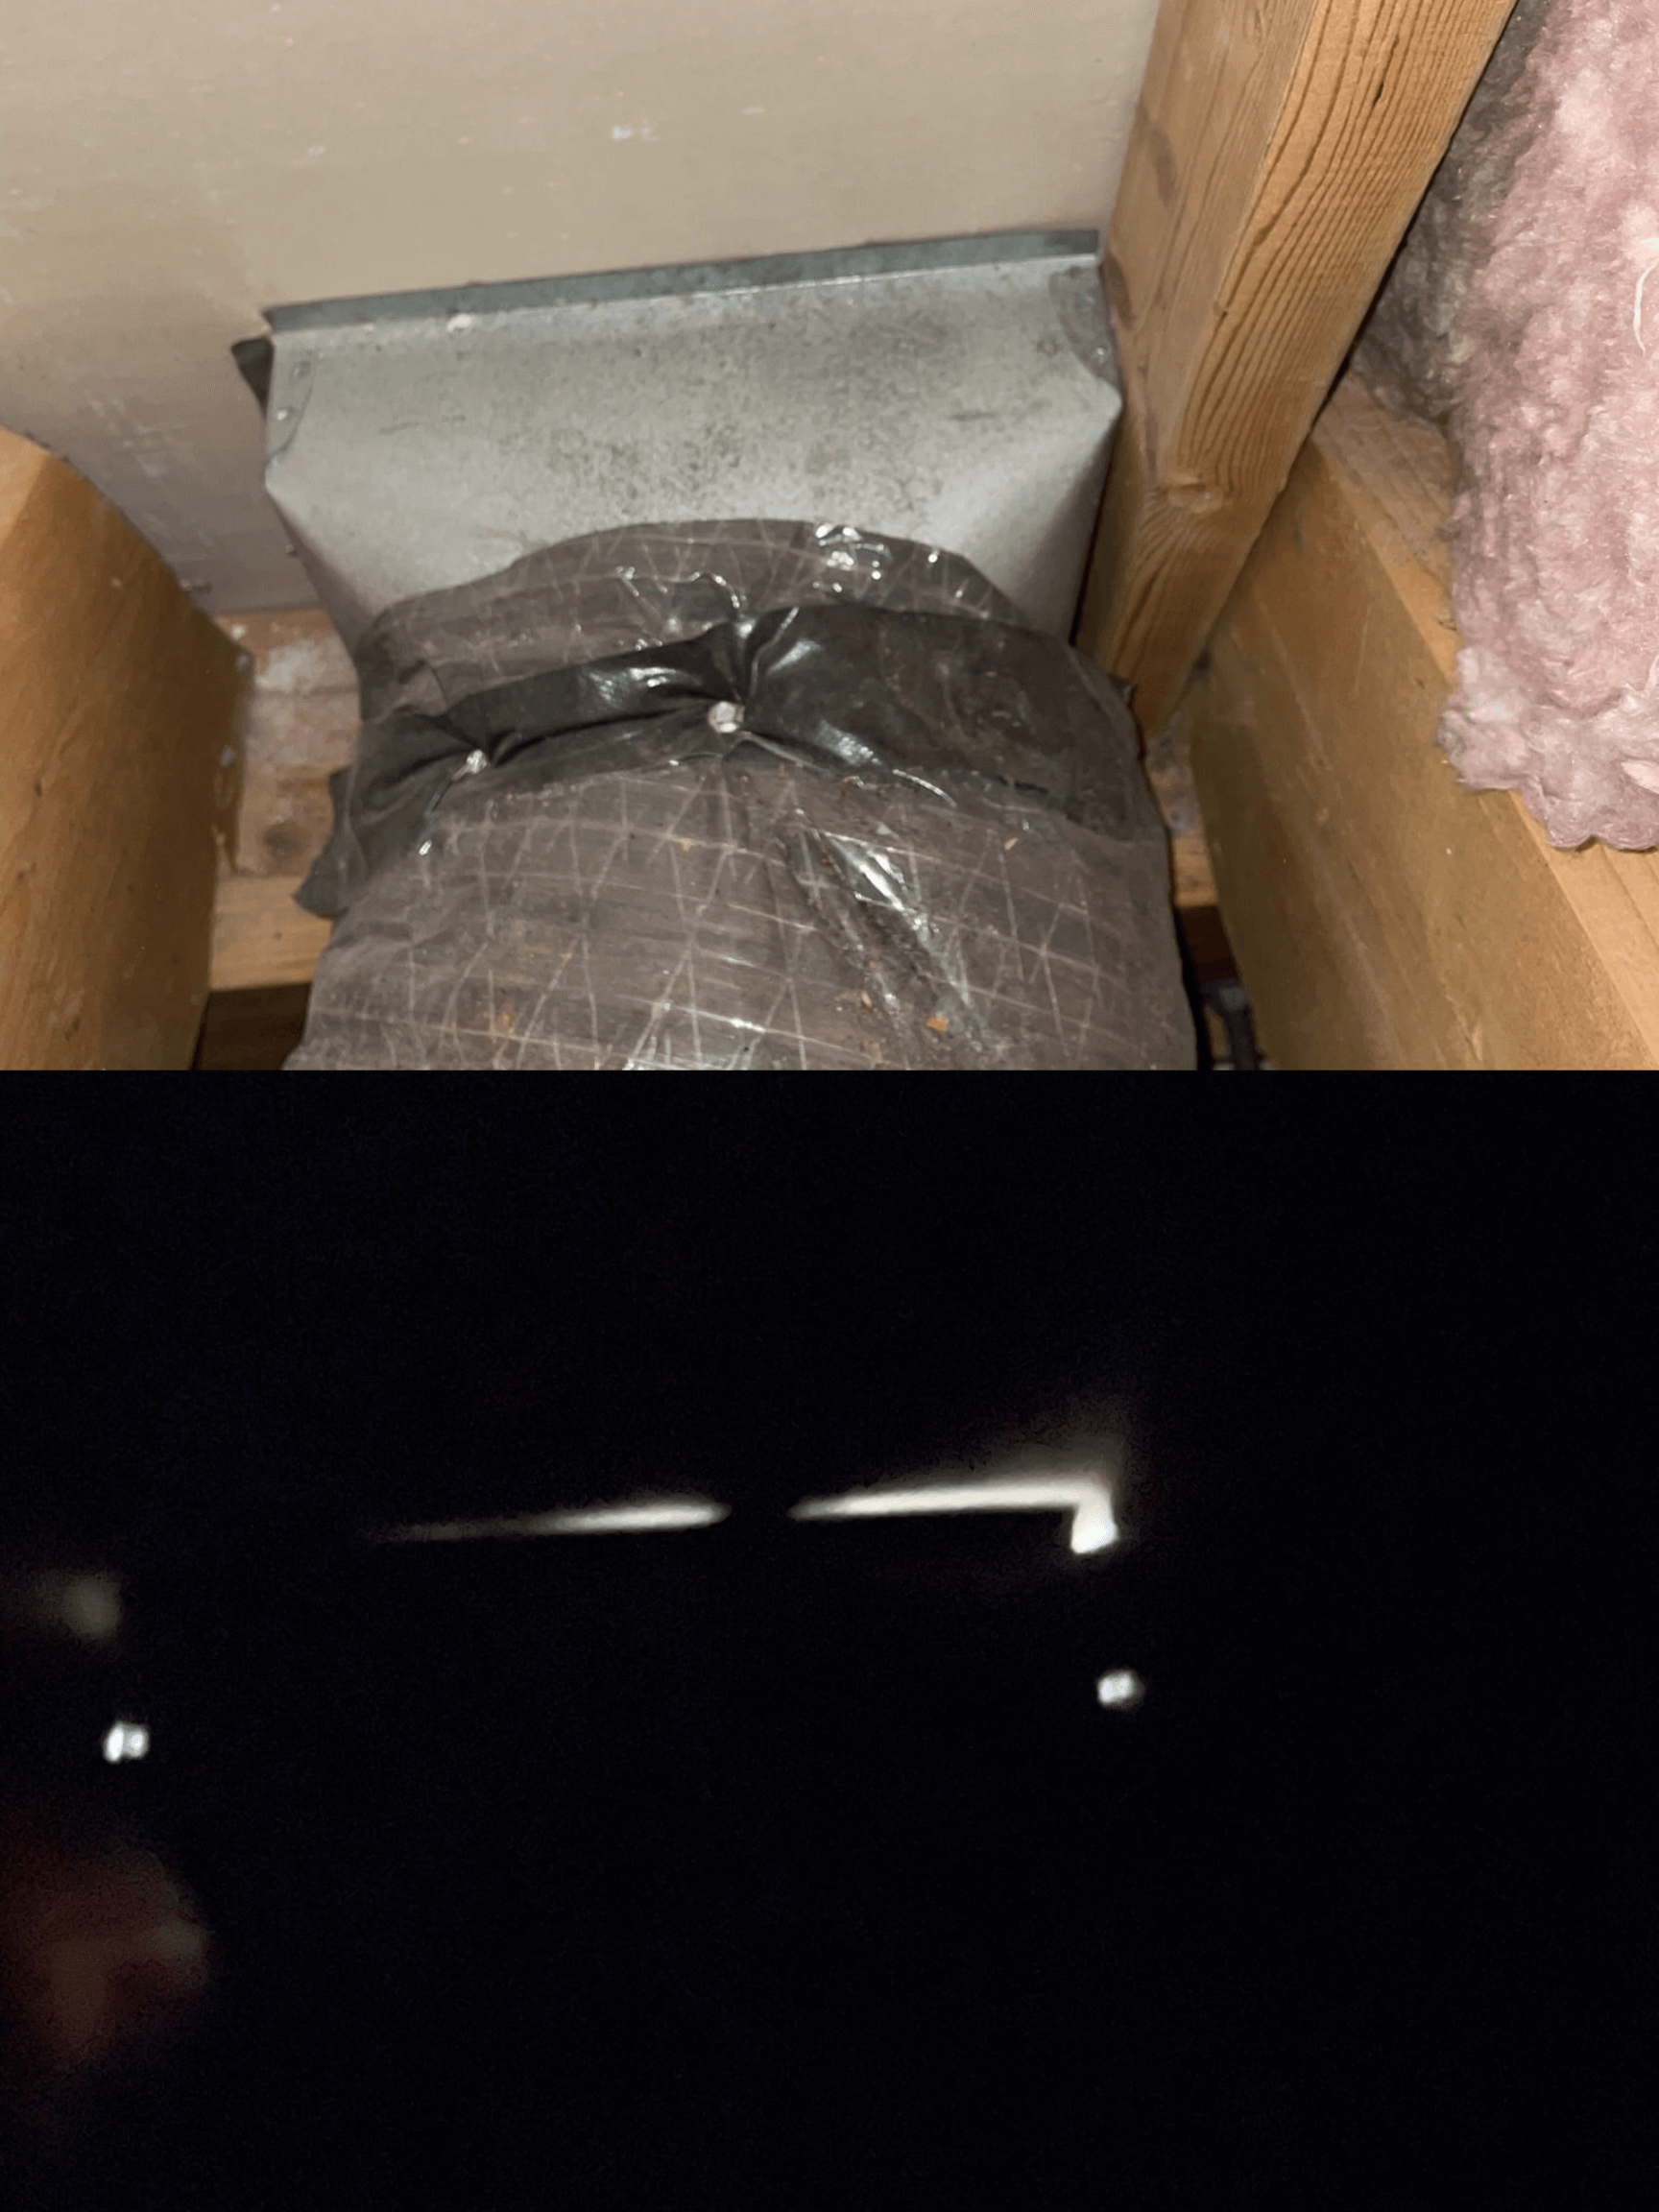
The supply boot at the master bedroom knee wall was inspected. One picture was taken with the flash to show the object and another picture was taken without the flash to indicate how much light from the master bedroom is visible from the attic. This is a clear connection between the living space to the attic that allows heat to escape causing uncomfortable drafts and high winter bills.
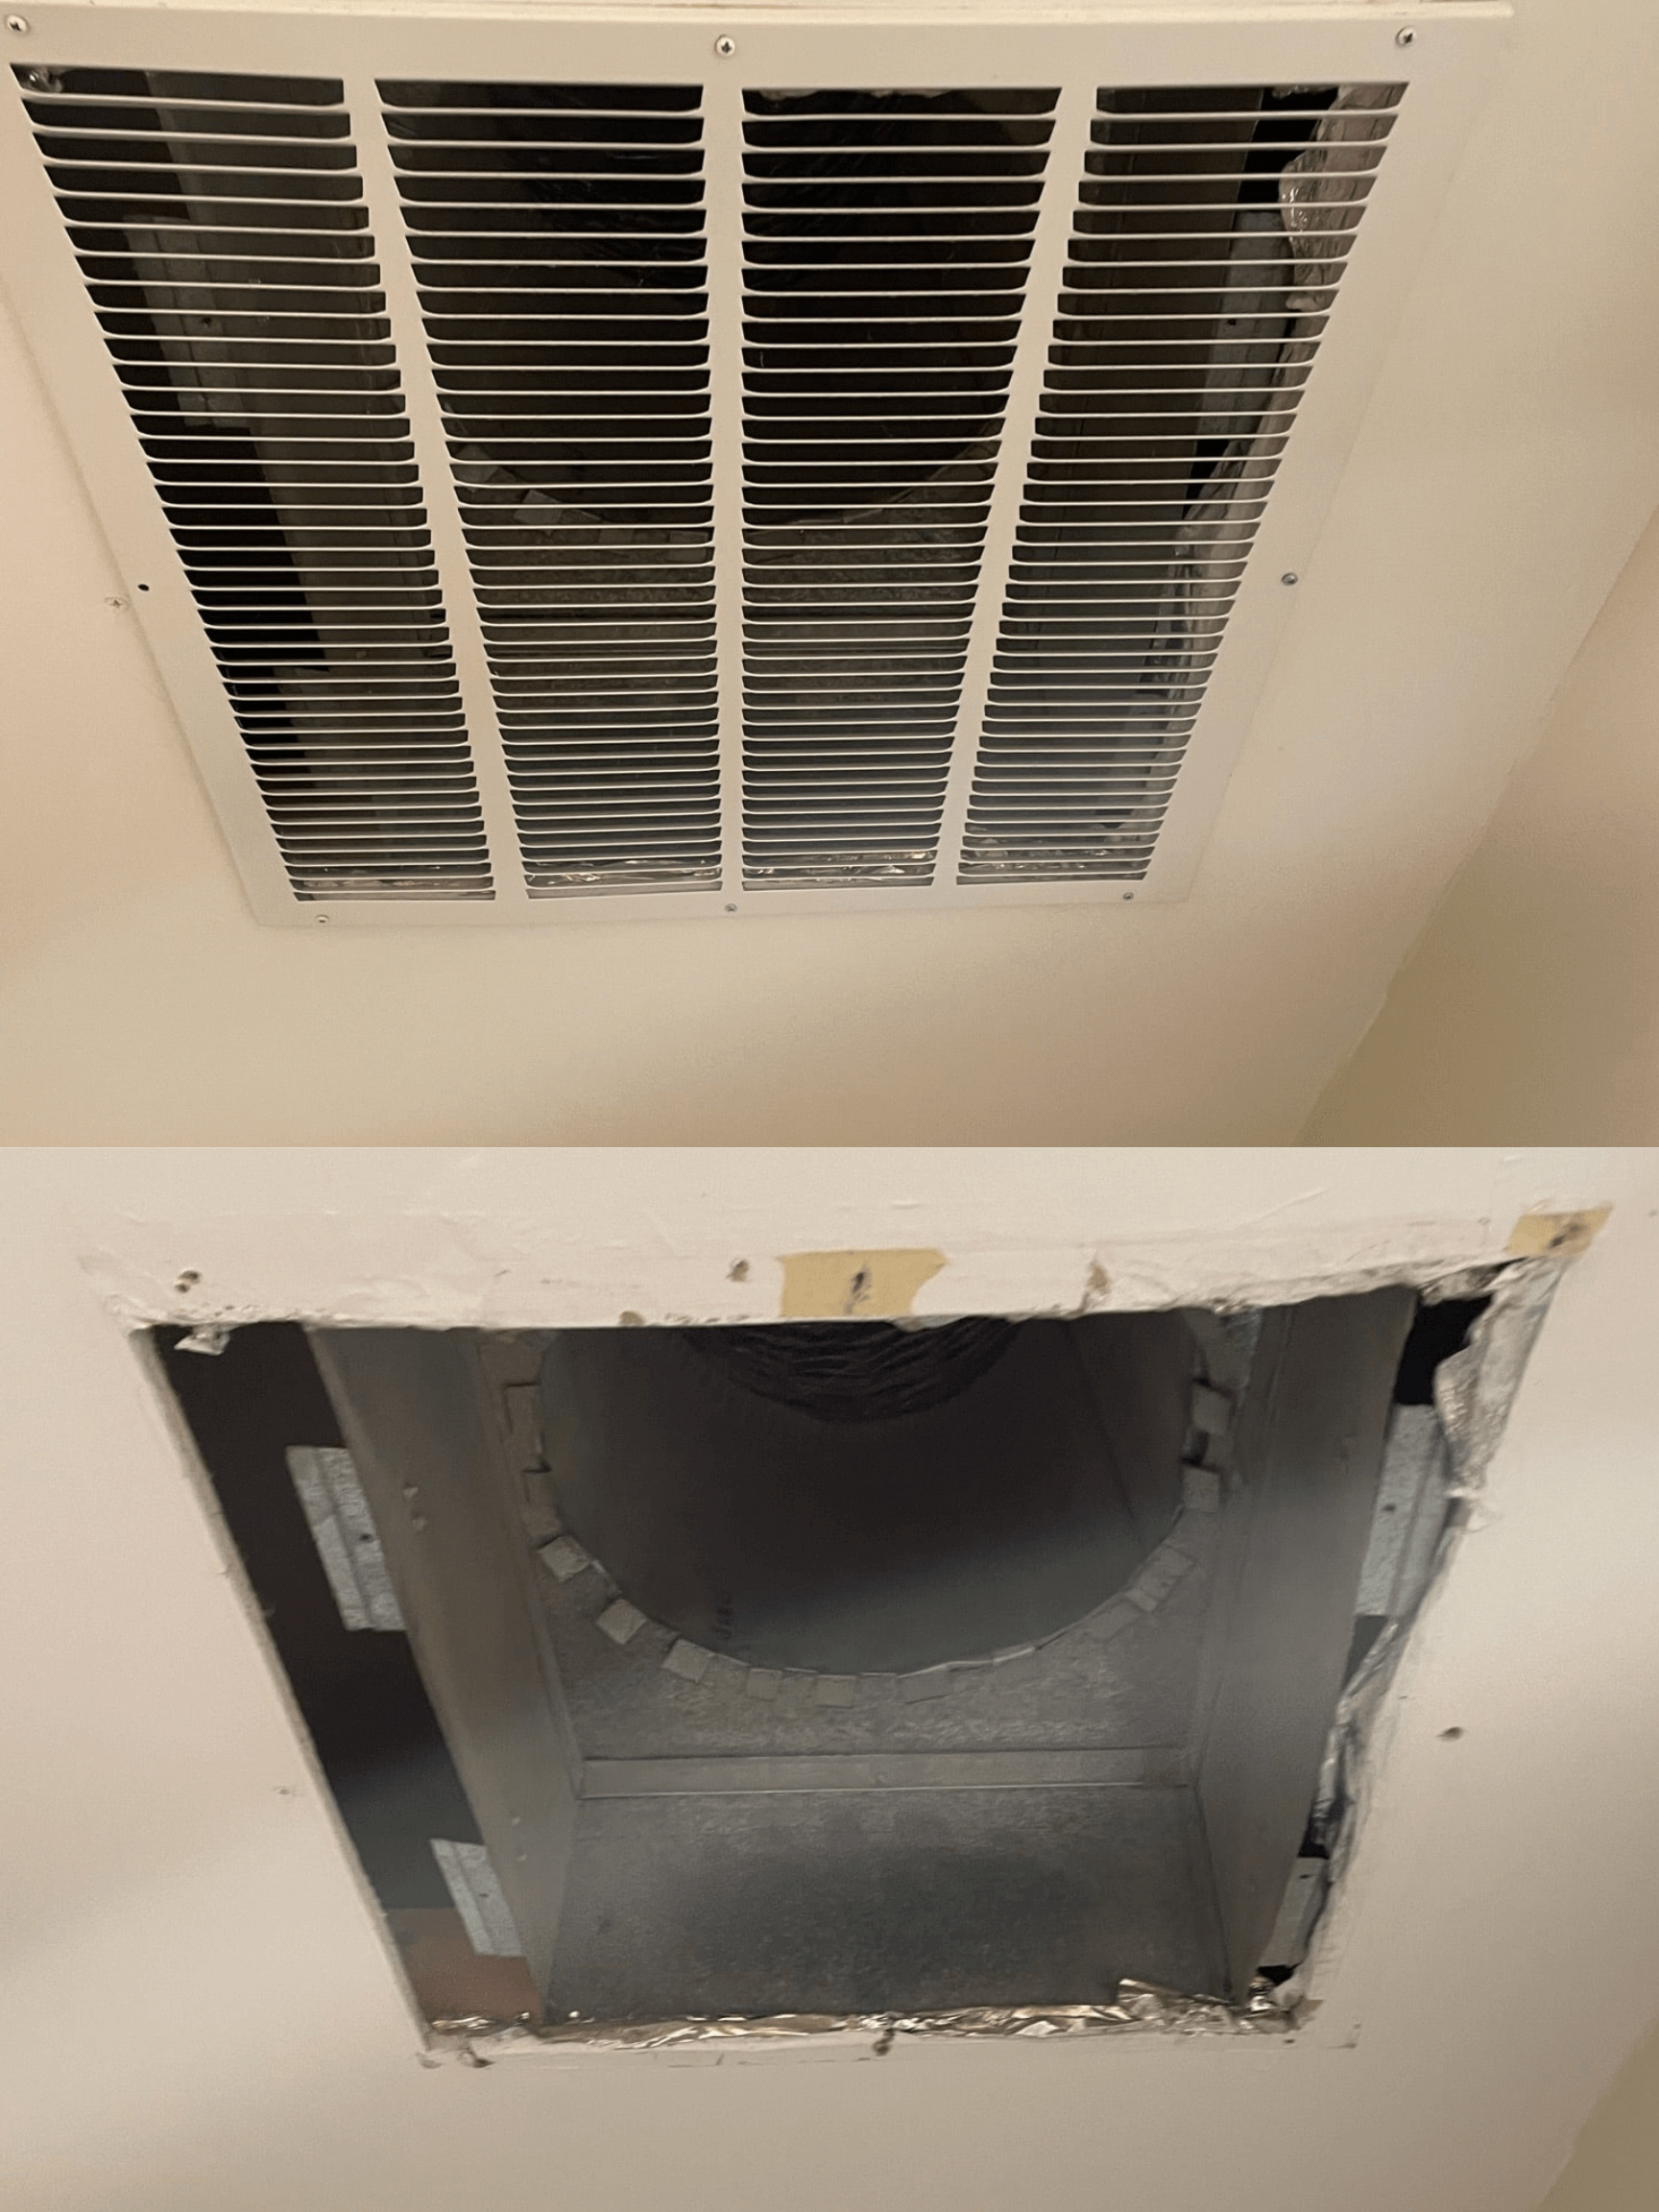
During the blower door test a huge draft was felt when walking under the return duct. The return grill was taken off to show HUGE gaps between the drywall being cut out and the actual return register. Due to the position of the air handler and return duct, it was impossible to see from the attic. This gigantic leakage point was created during the addition construction.

Recessed lights are always going to leak and the ones in this home are no different. The flash was turned off to show the light visible within the attic showing how heat is escaping to the outside.
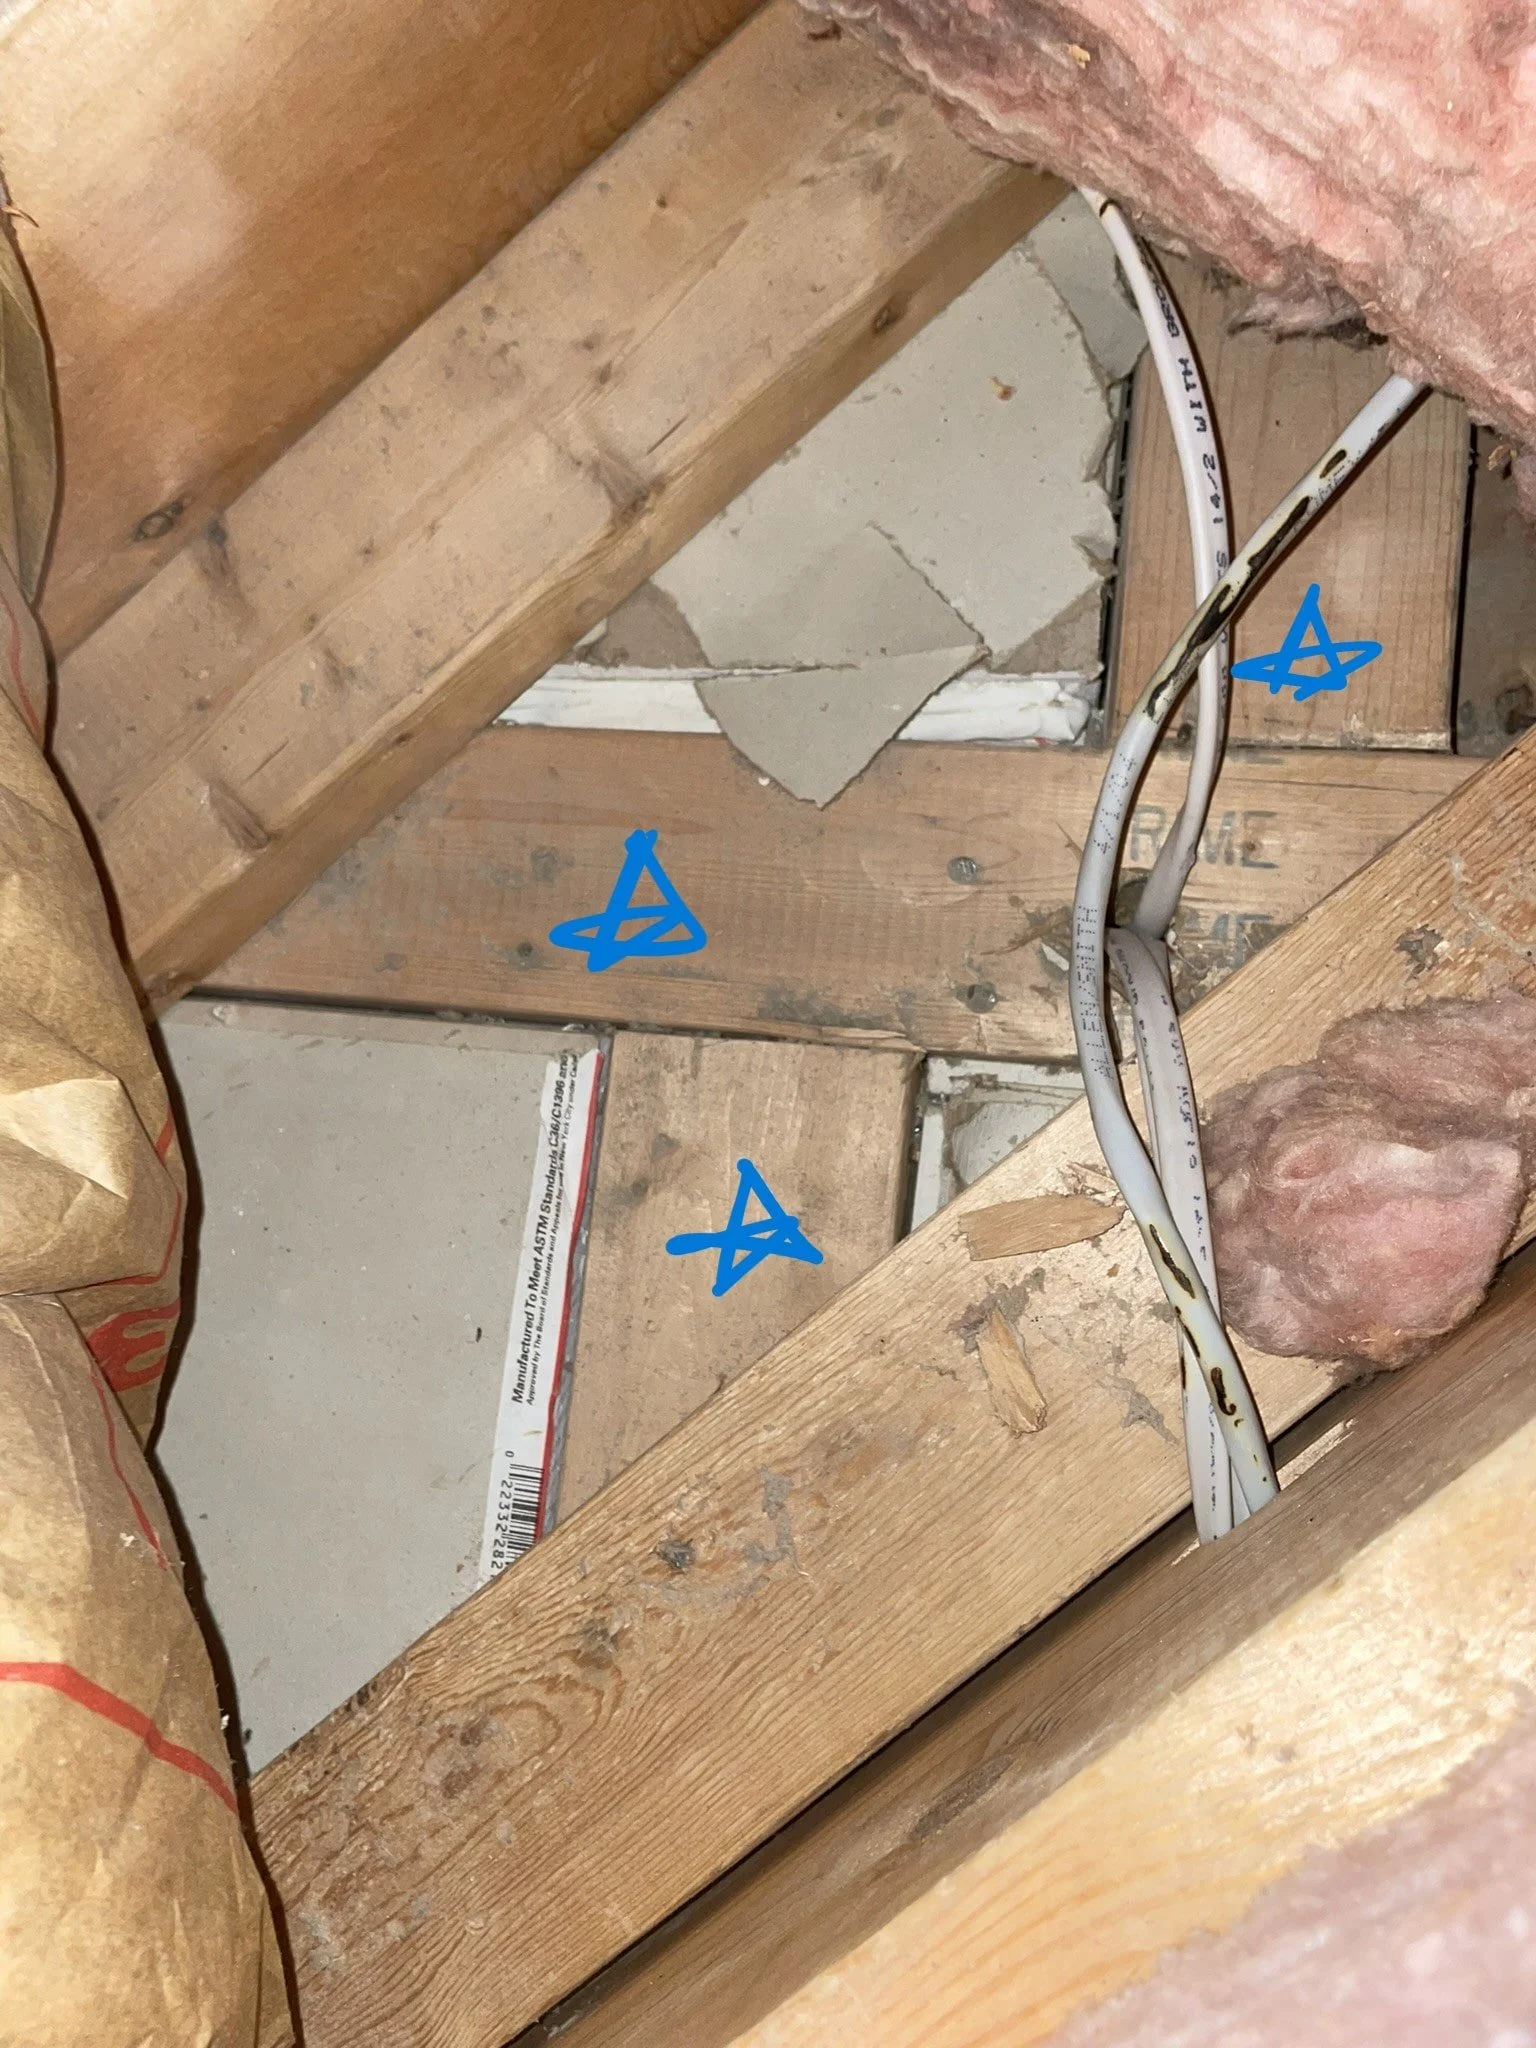
Picture of the attic floor after a piece of insulation was peeled away to show top plates marked with blue stars. The top plates are where the gaps between the interior walls meet the attic floor. On both sides of the marked 2x4’s conditioned air is allowed to escape and needs to be effectively sealed. It needs to be noted that the fiberglass batt insulation covering it does not stop the flow of air but only the transfer of heat.
The below concerns and opportunities for improvement were found after a thorough inspection of the customer’s attic.
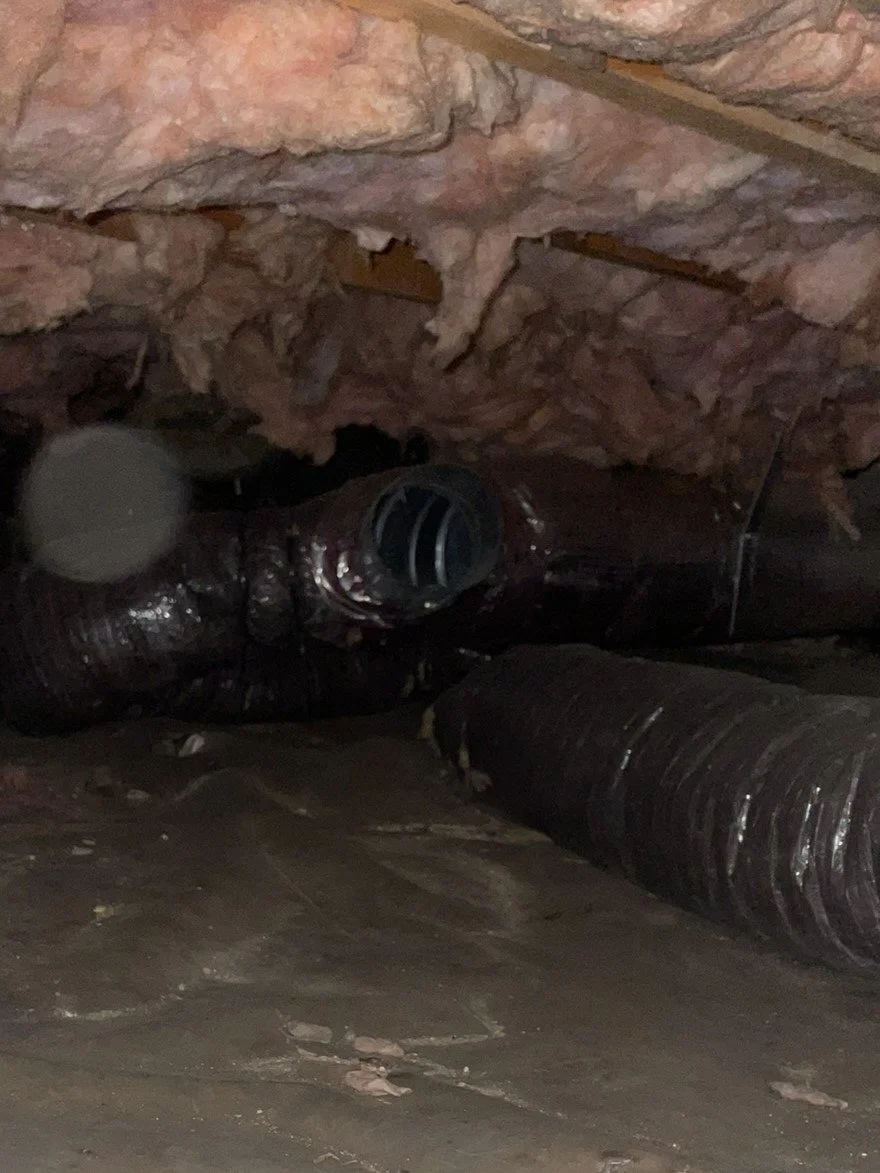
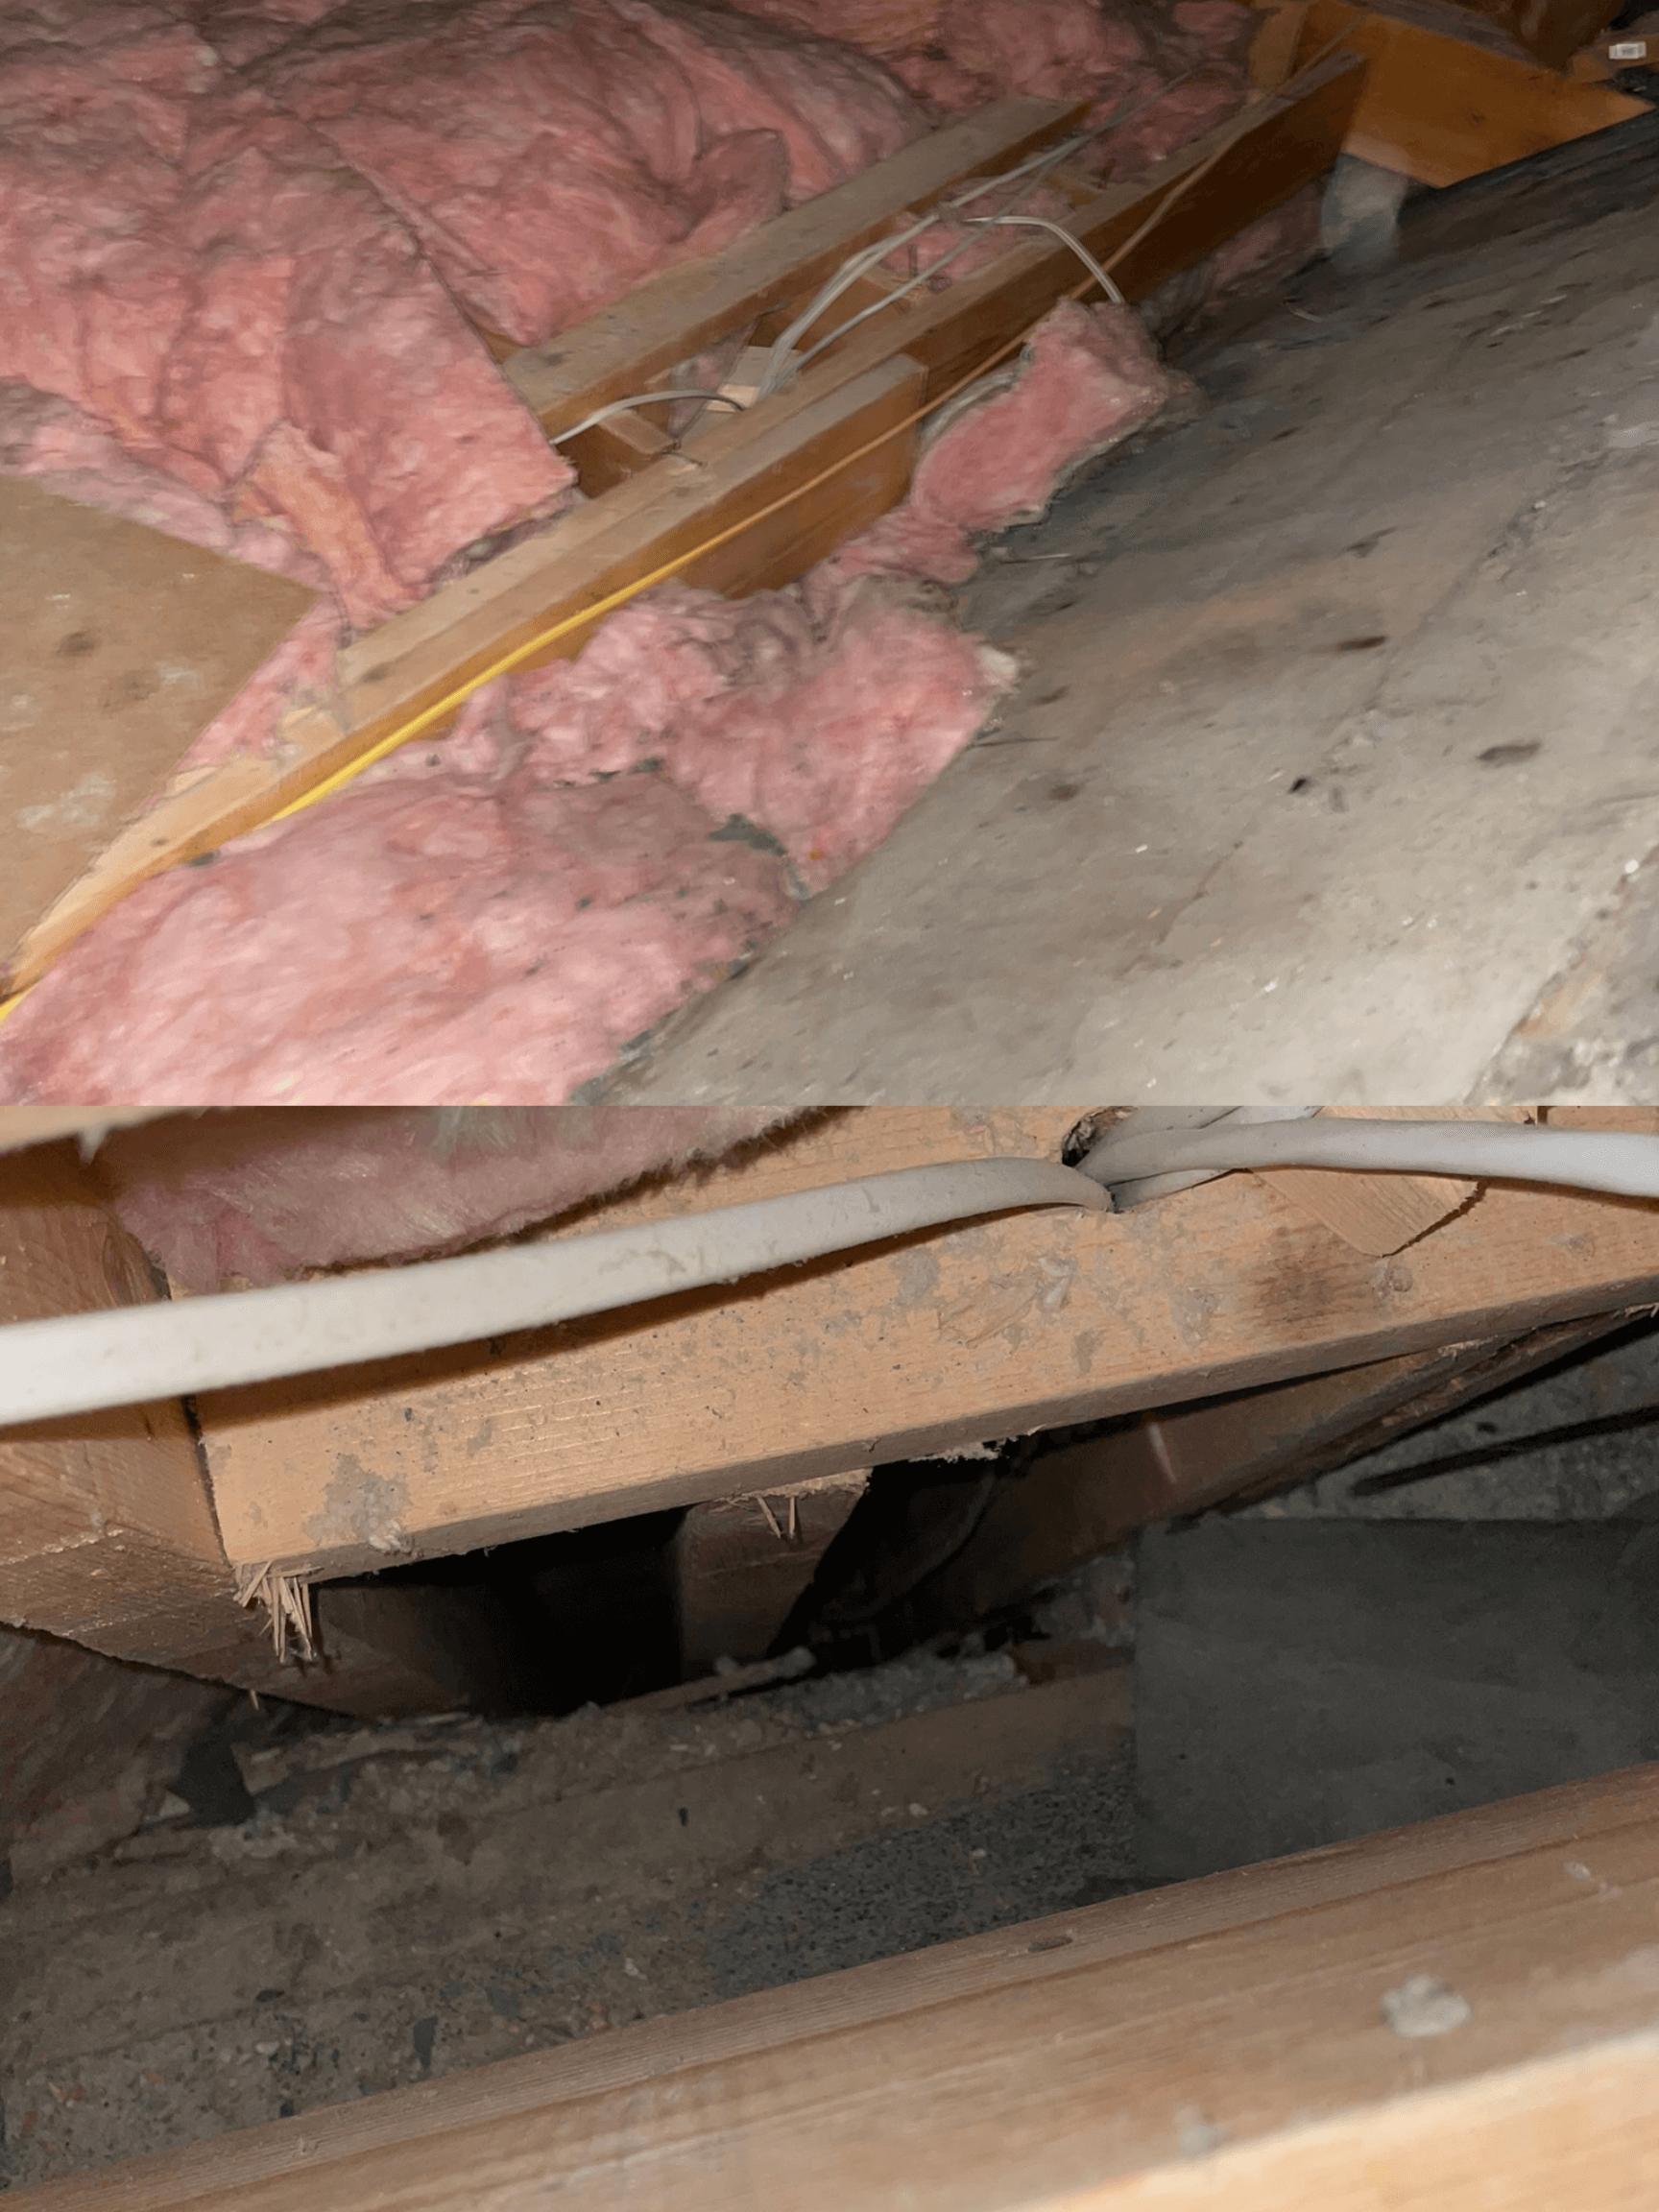
A duct was found to be disconnected in the crawl space that led to the living room. The register in the living room is allowing cold air to enter that space and is a contributing factor to its discomfort.
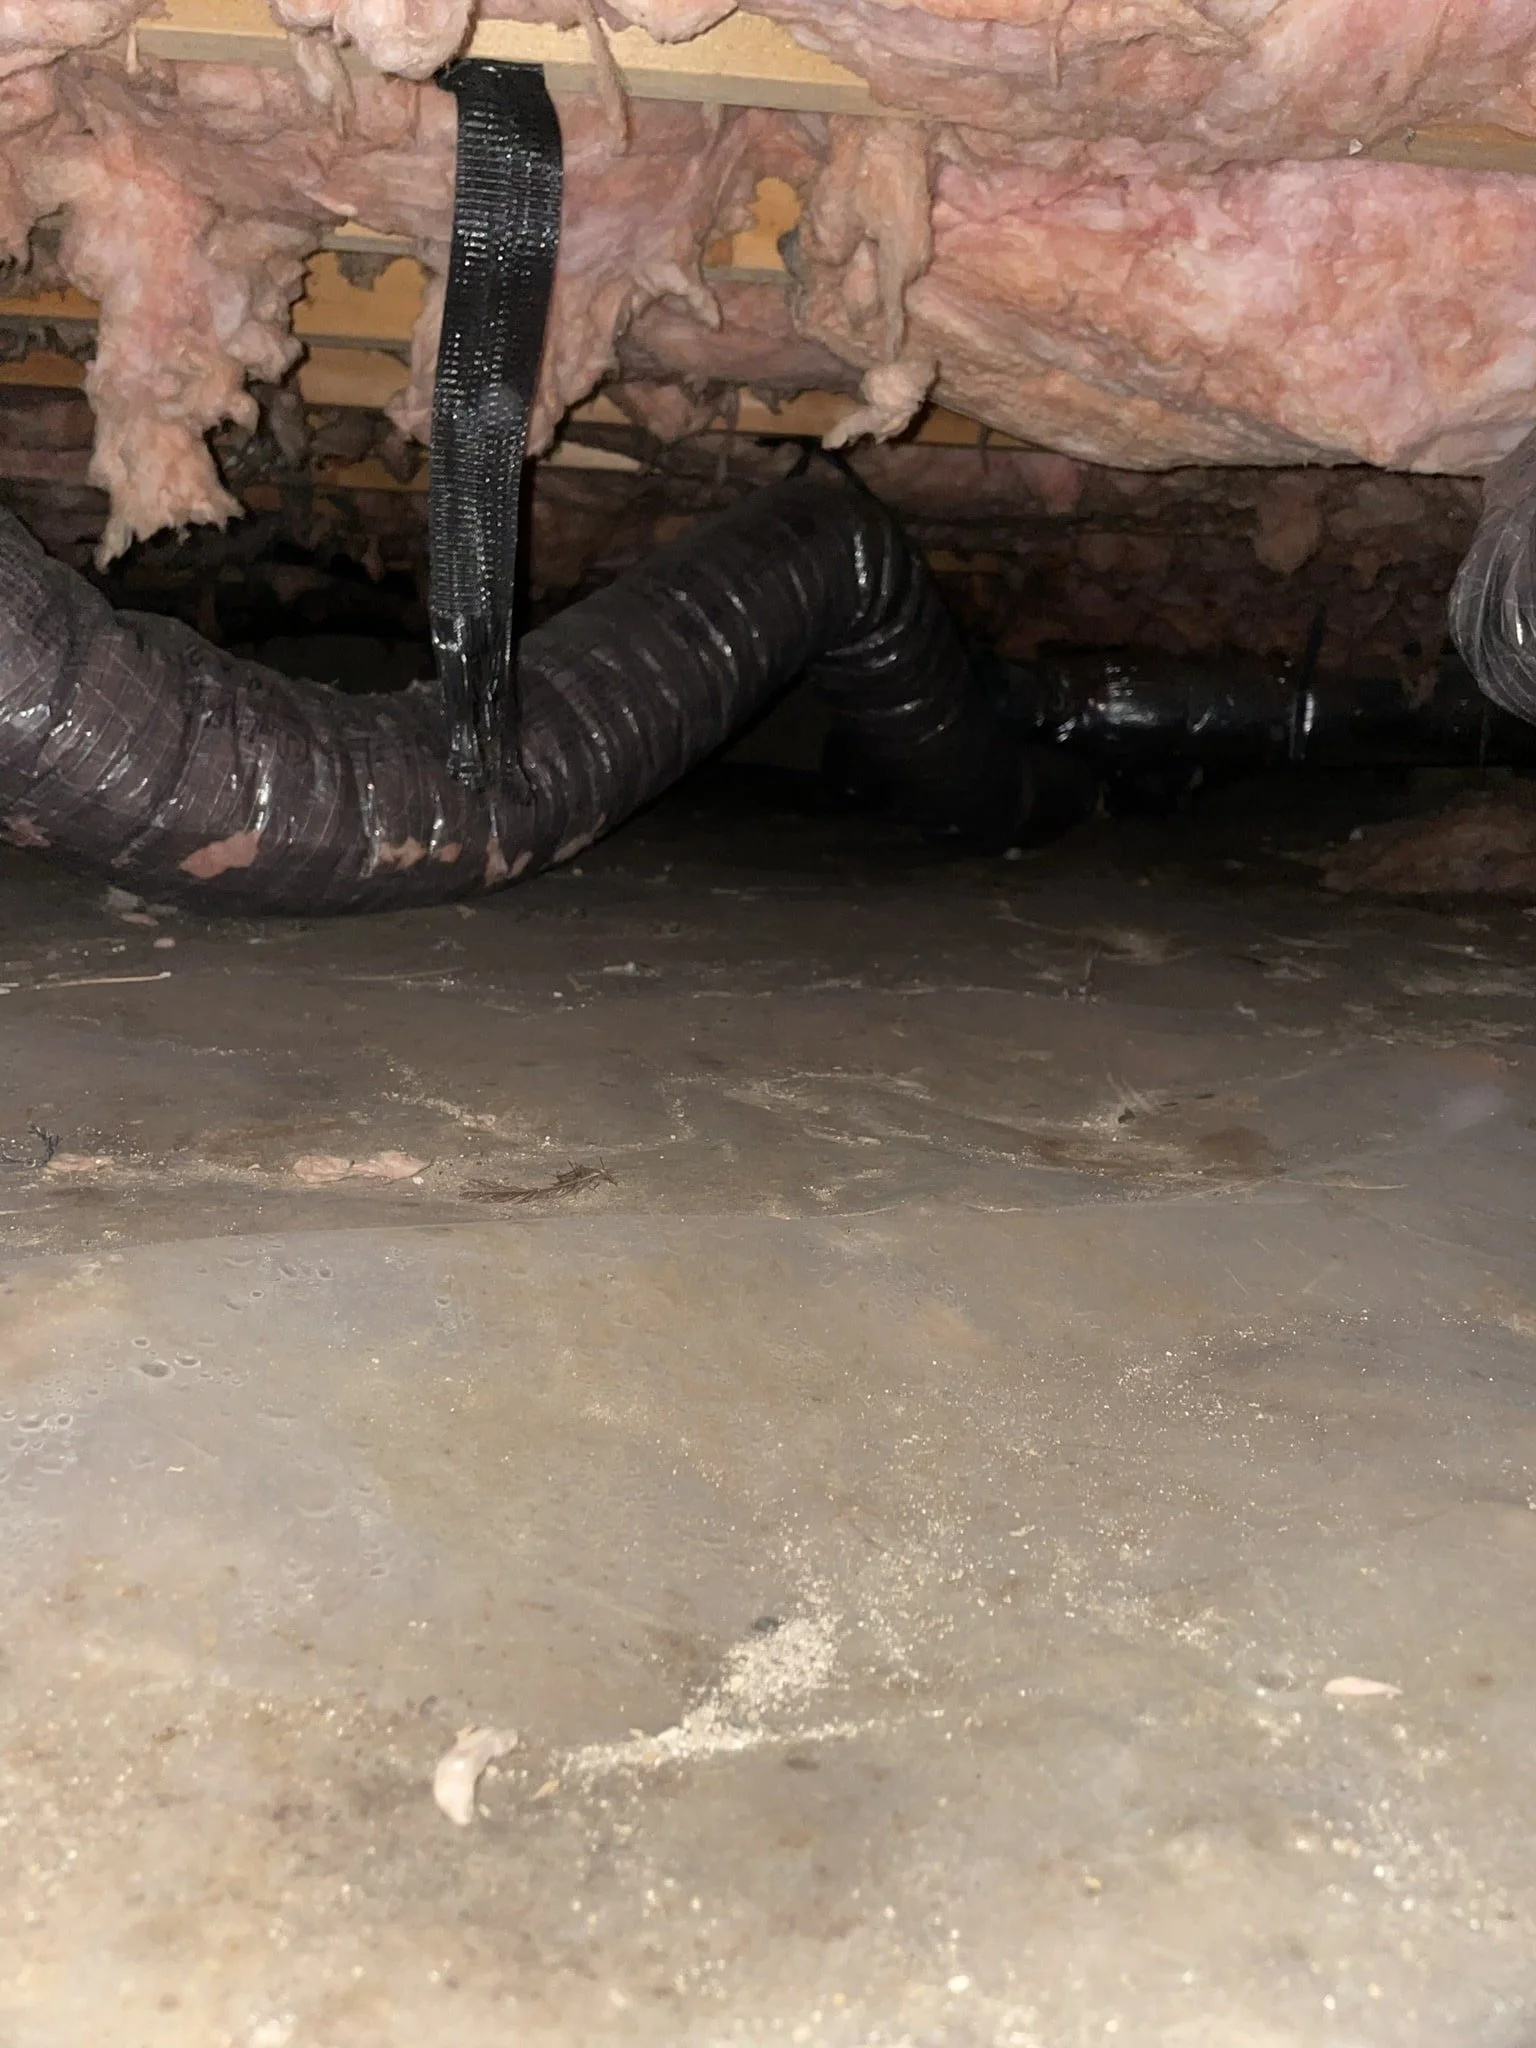
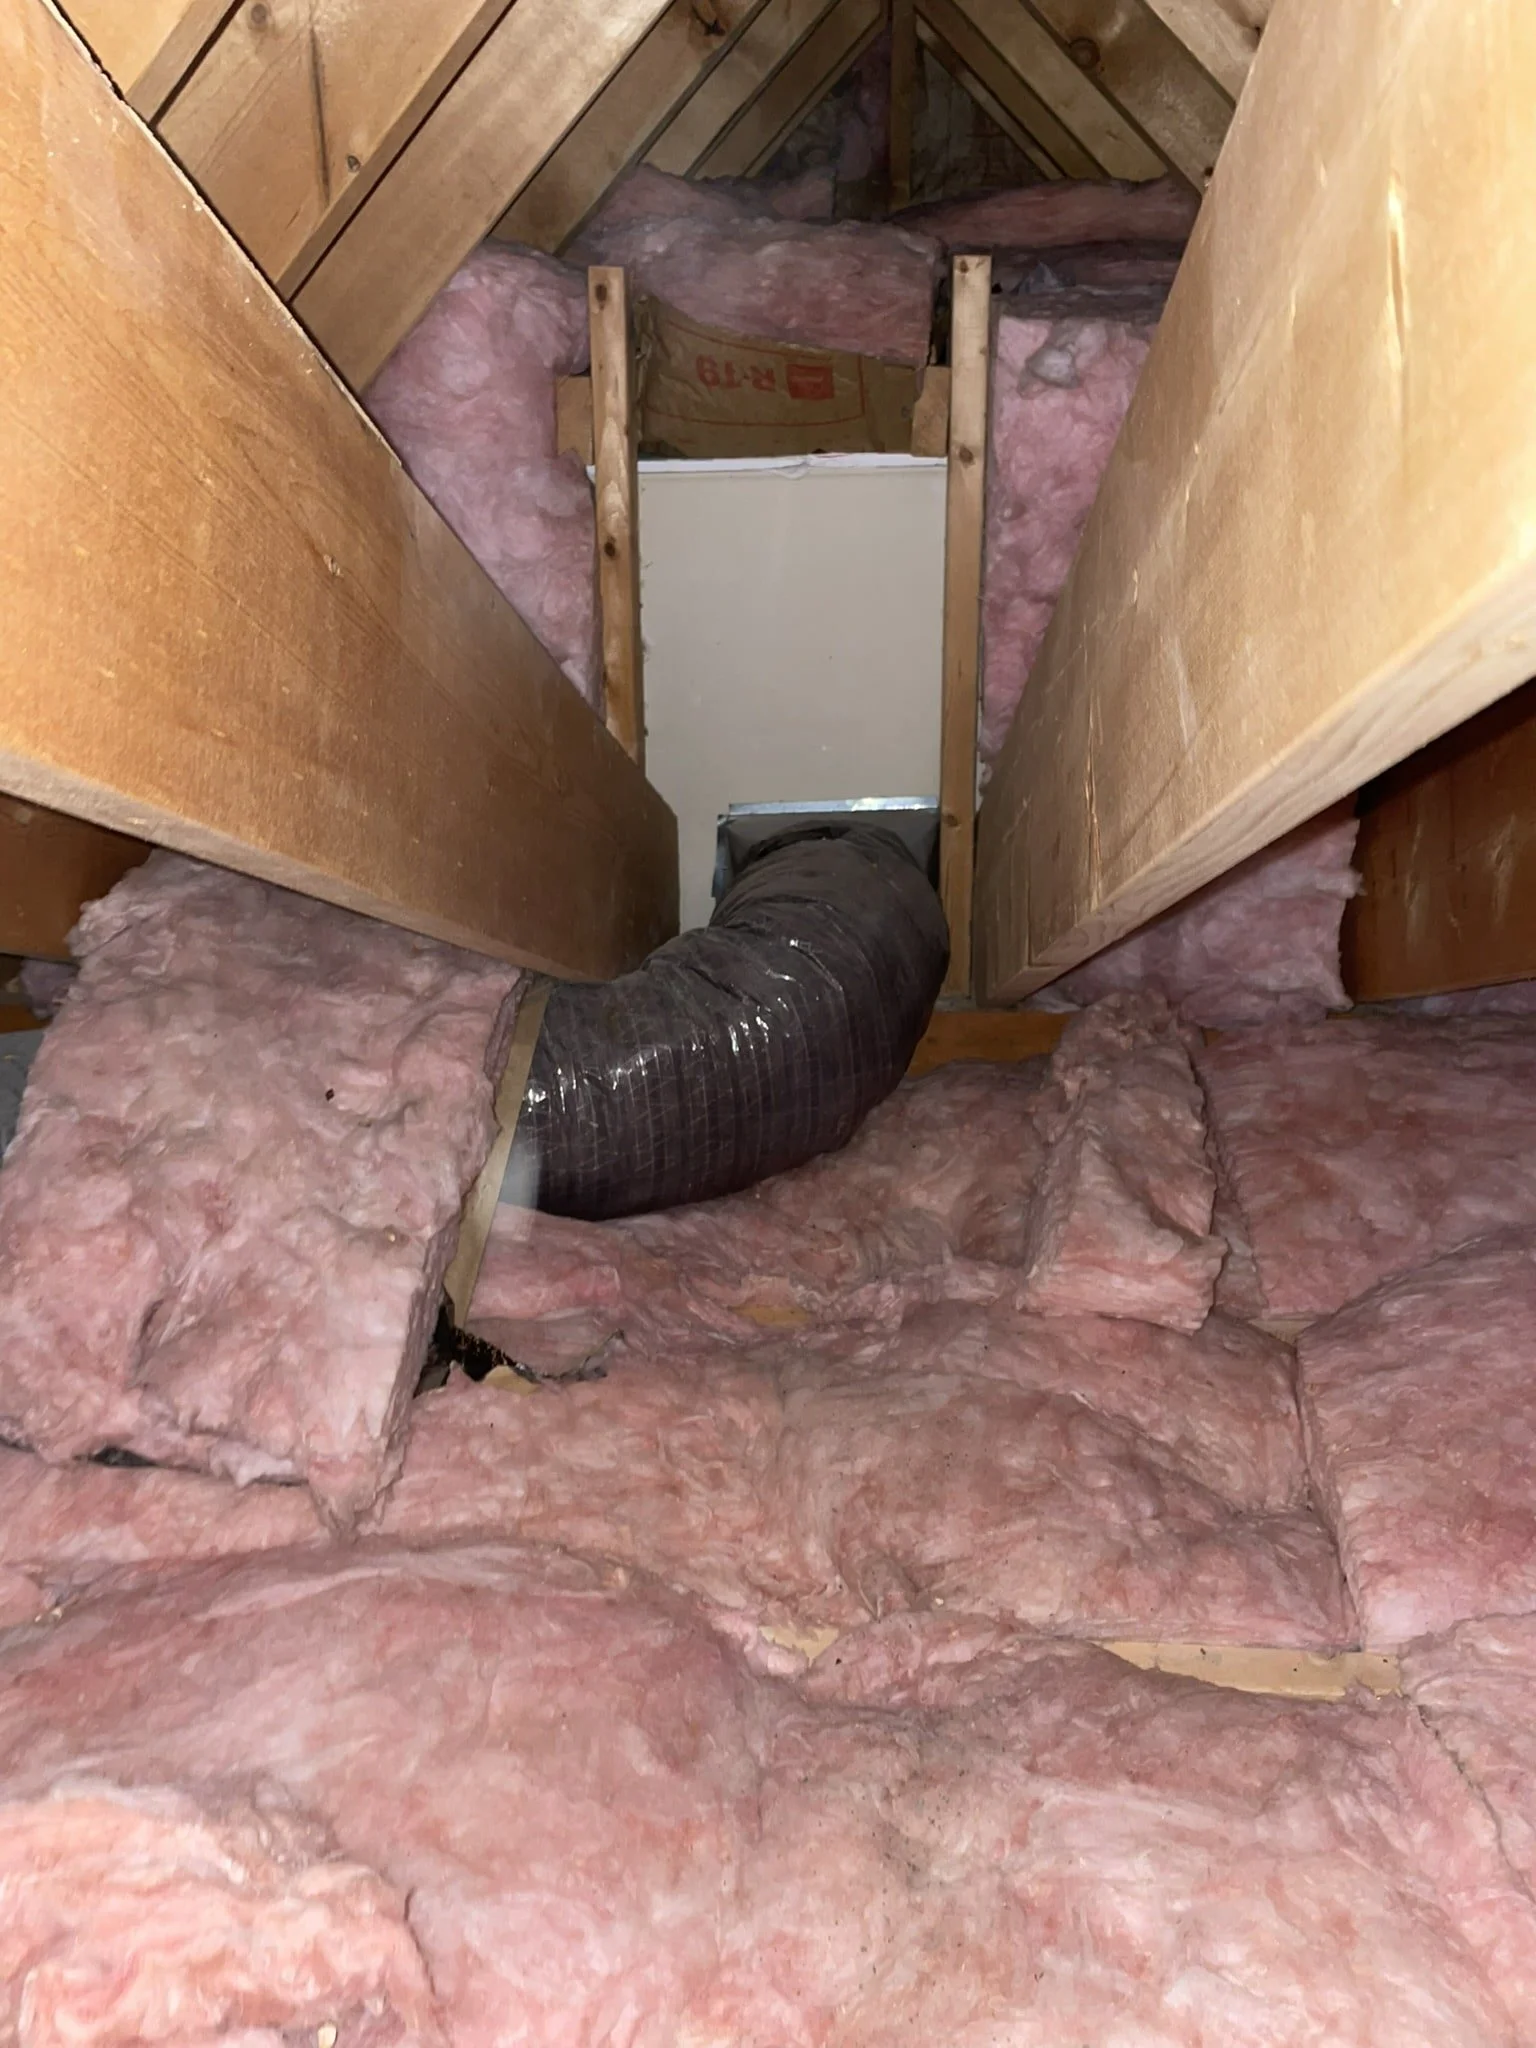
If the ductwork in the crawl space were properly attached it would still be configured very poorly. The roller coaster configuration creates needless restrictions in delivering the conditioned air to the living room above. It is recommended that the line be shortened to make it more taut and straight.
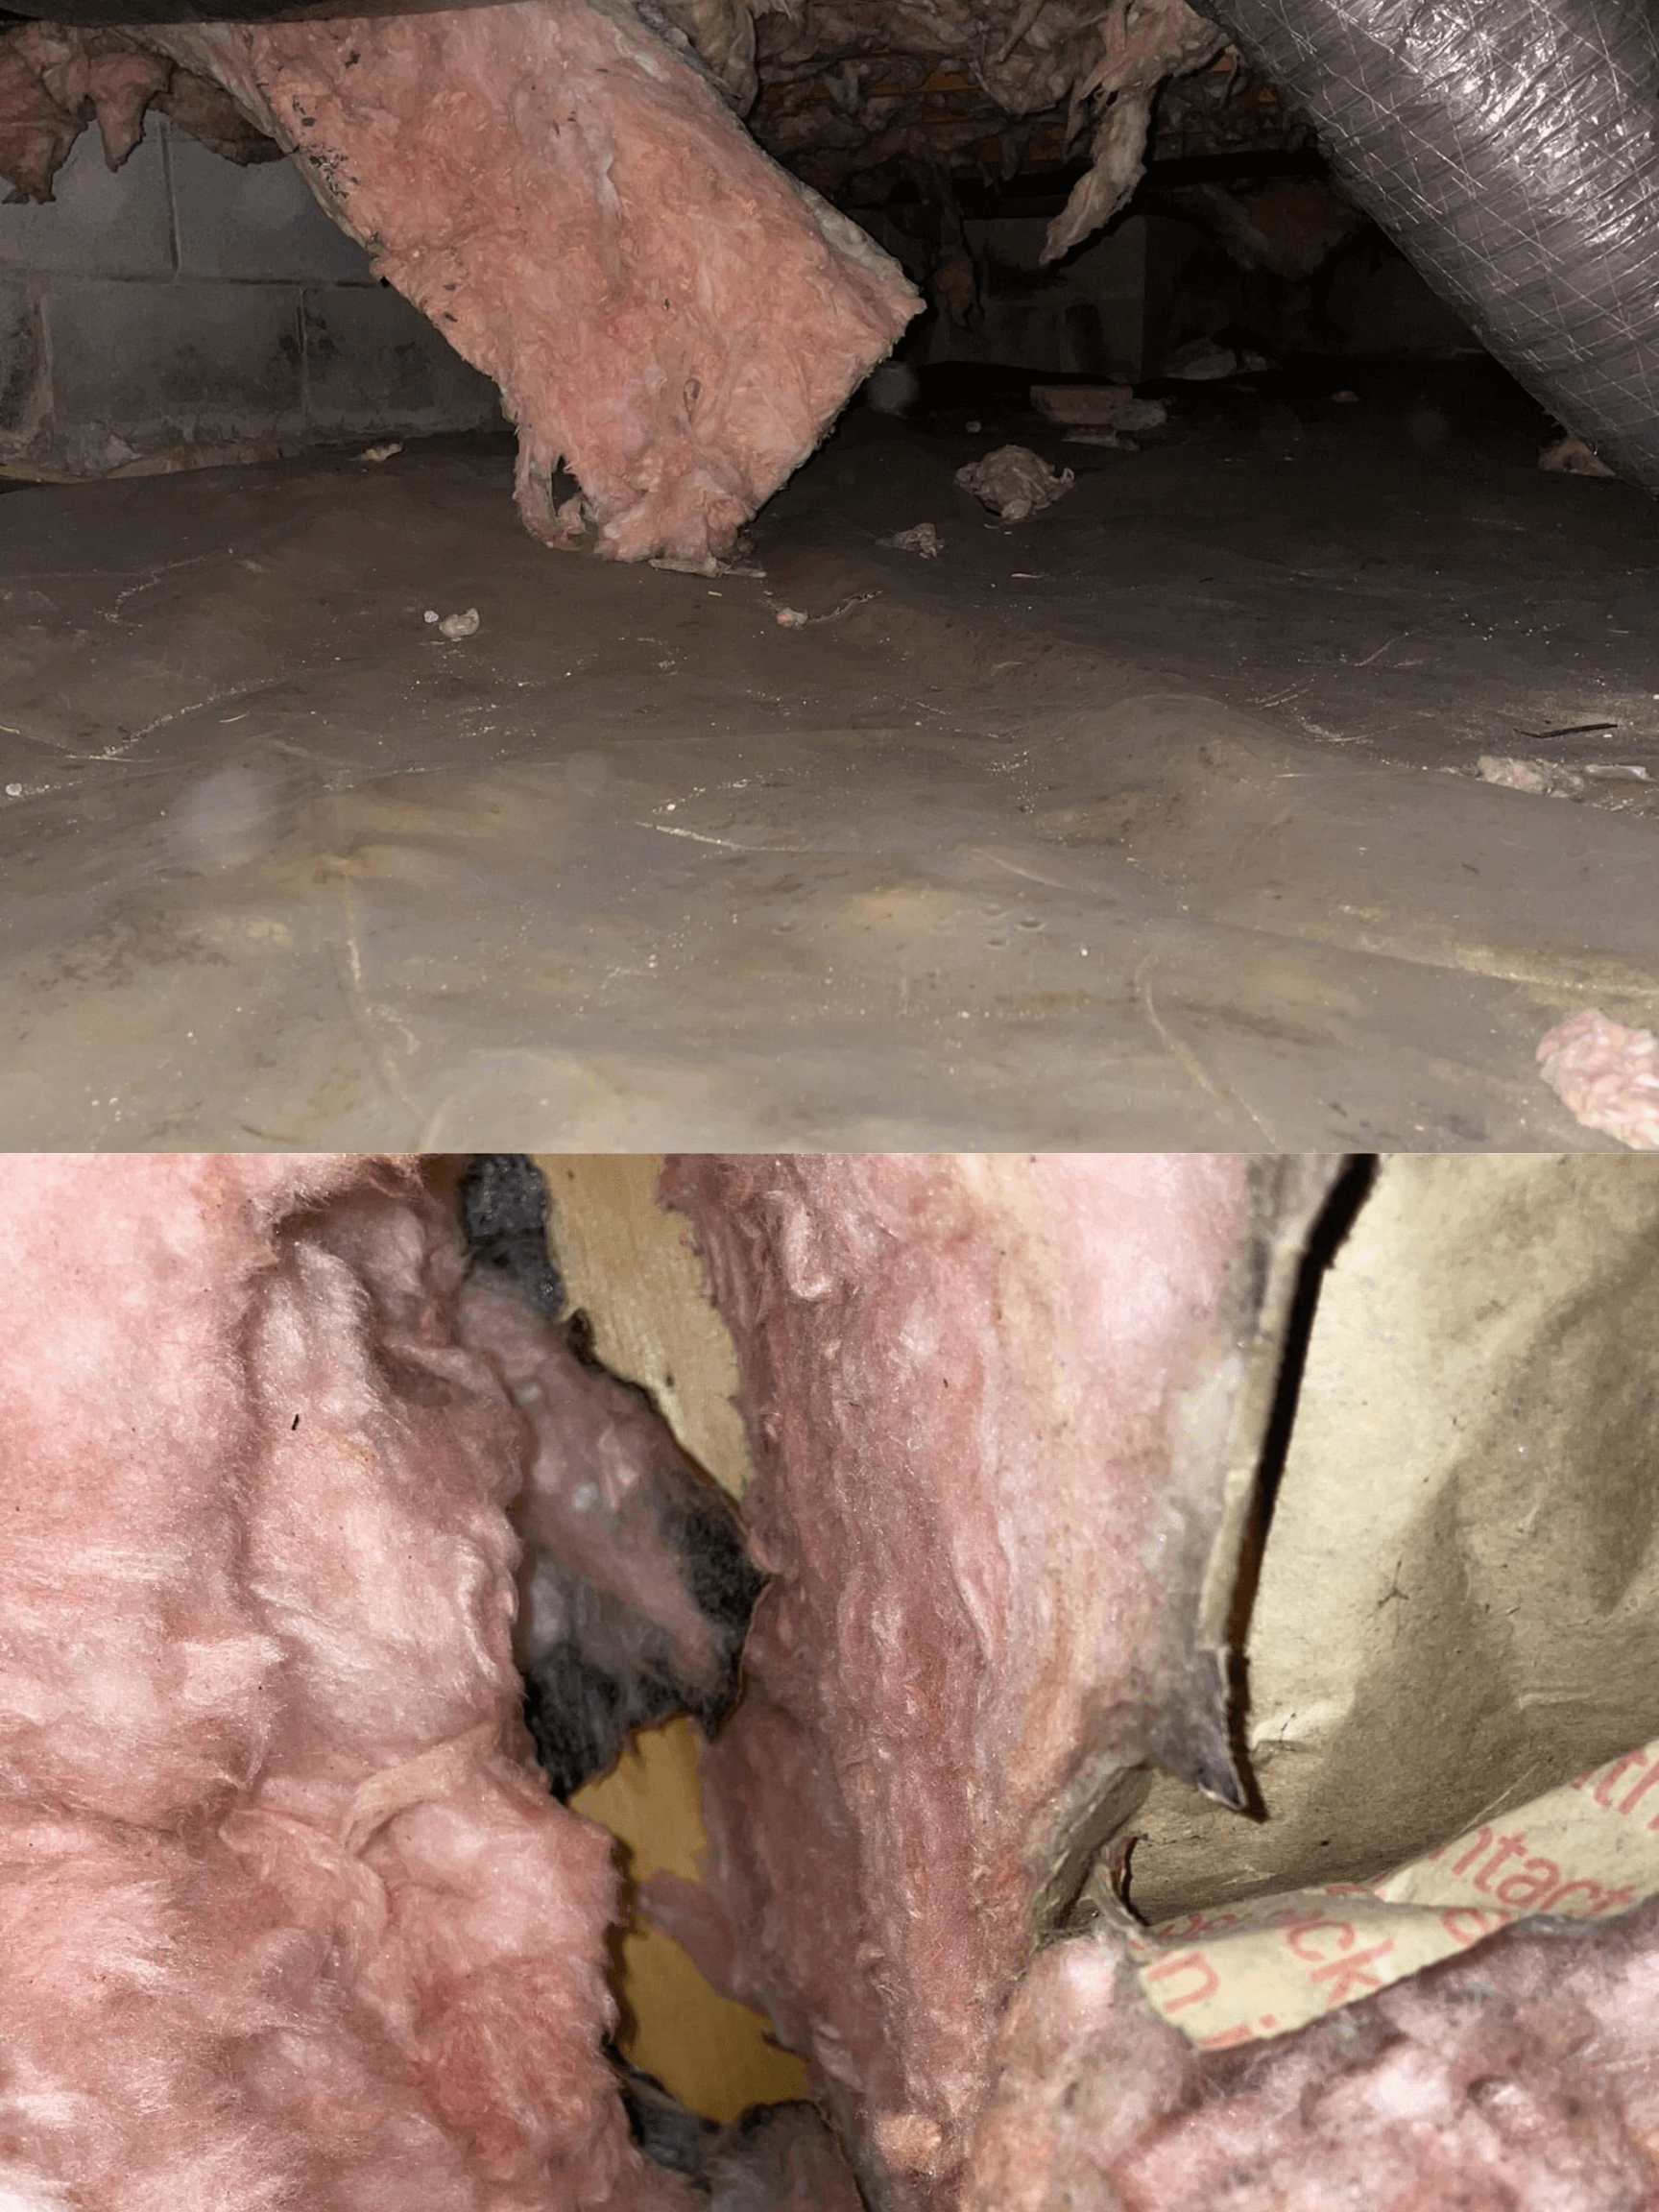
The top picture shows a piece of fallen insulation. The bottom picture is looking up at the subfloor where there is a gap between the pieces of missing insulation. These gaps may be small but greatly reduce the effectiveness of the insulation.
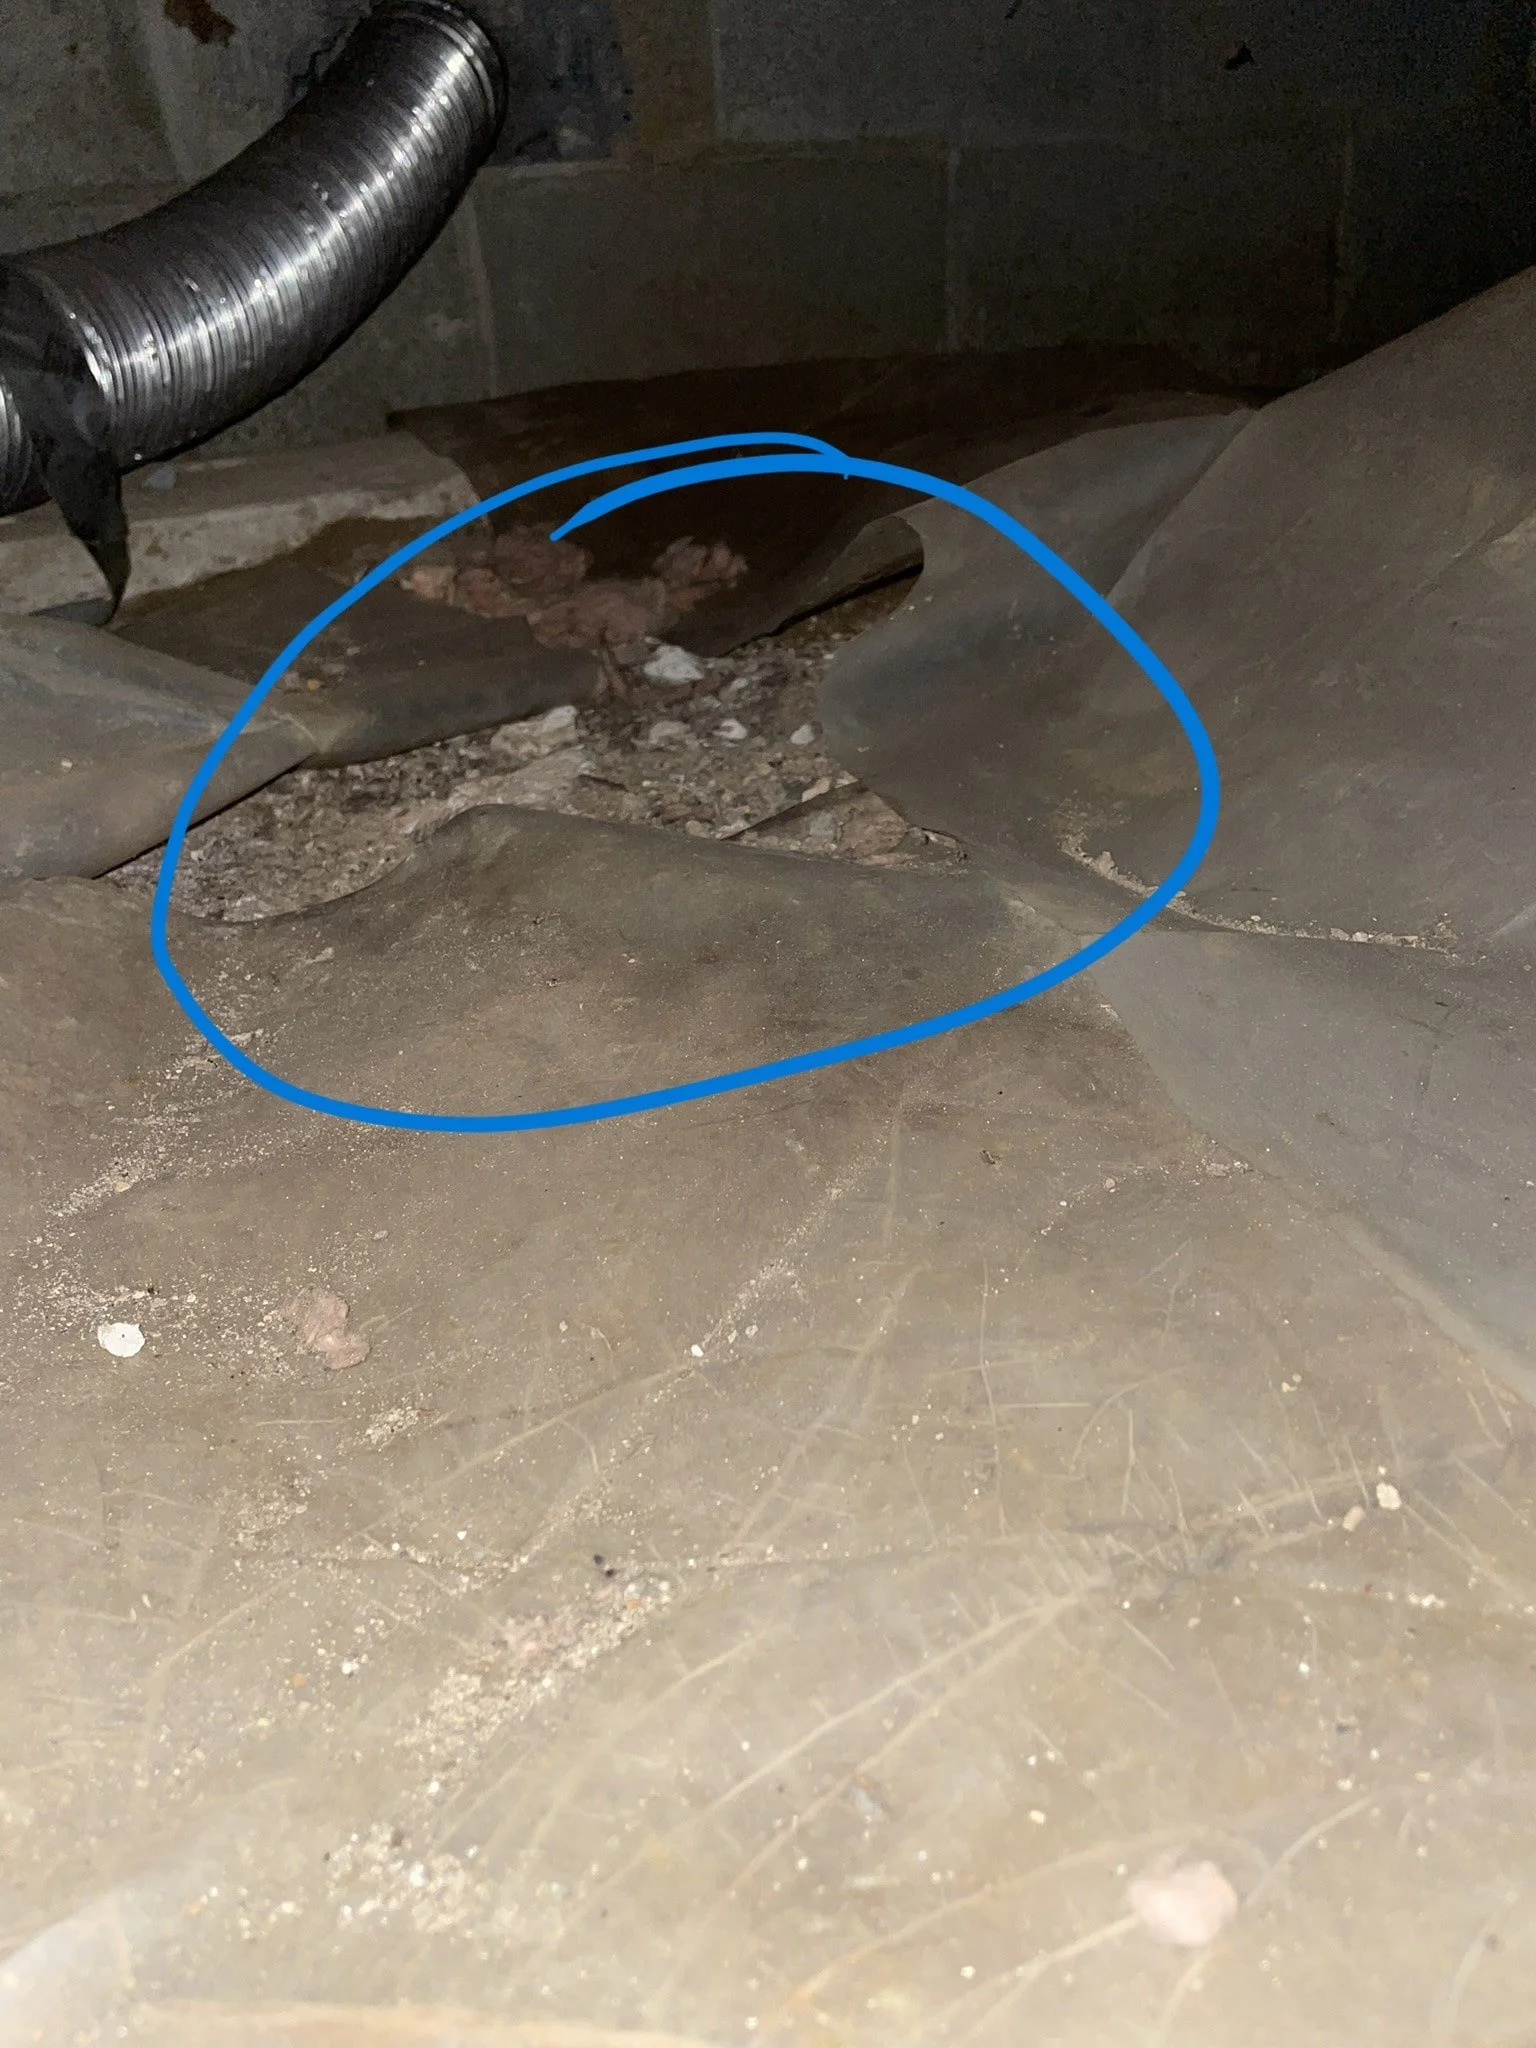
A 6-millimeter thick vapor barrier (plastic tarp) was attempted to be laid across the crawl space floor. The purpose is to stop moisture from rising from the ground and entering the home. This excess humidity degrades indoor air quality and attracts pests into the crawl space. However, this picture shows a clear tear in the plastic sheets.
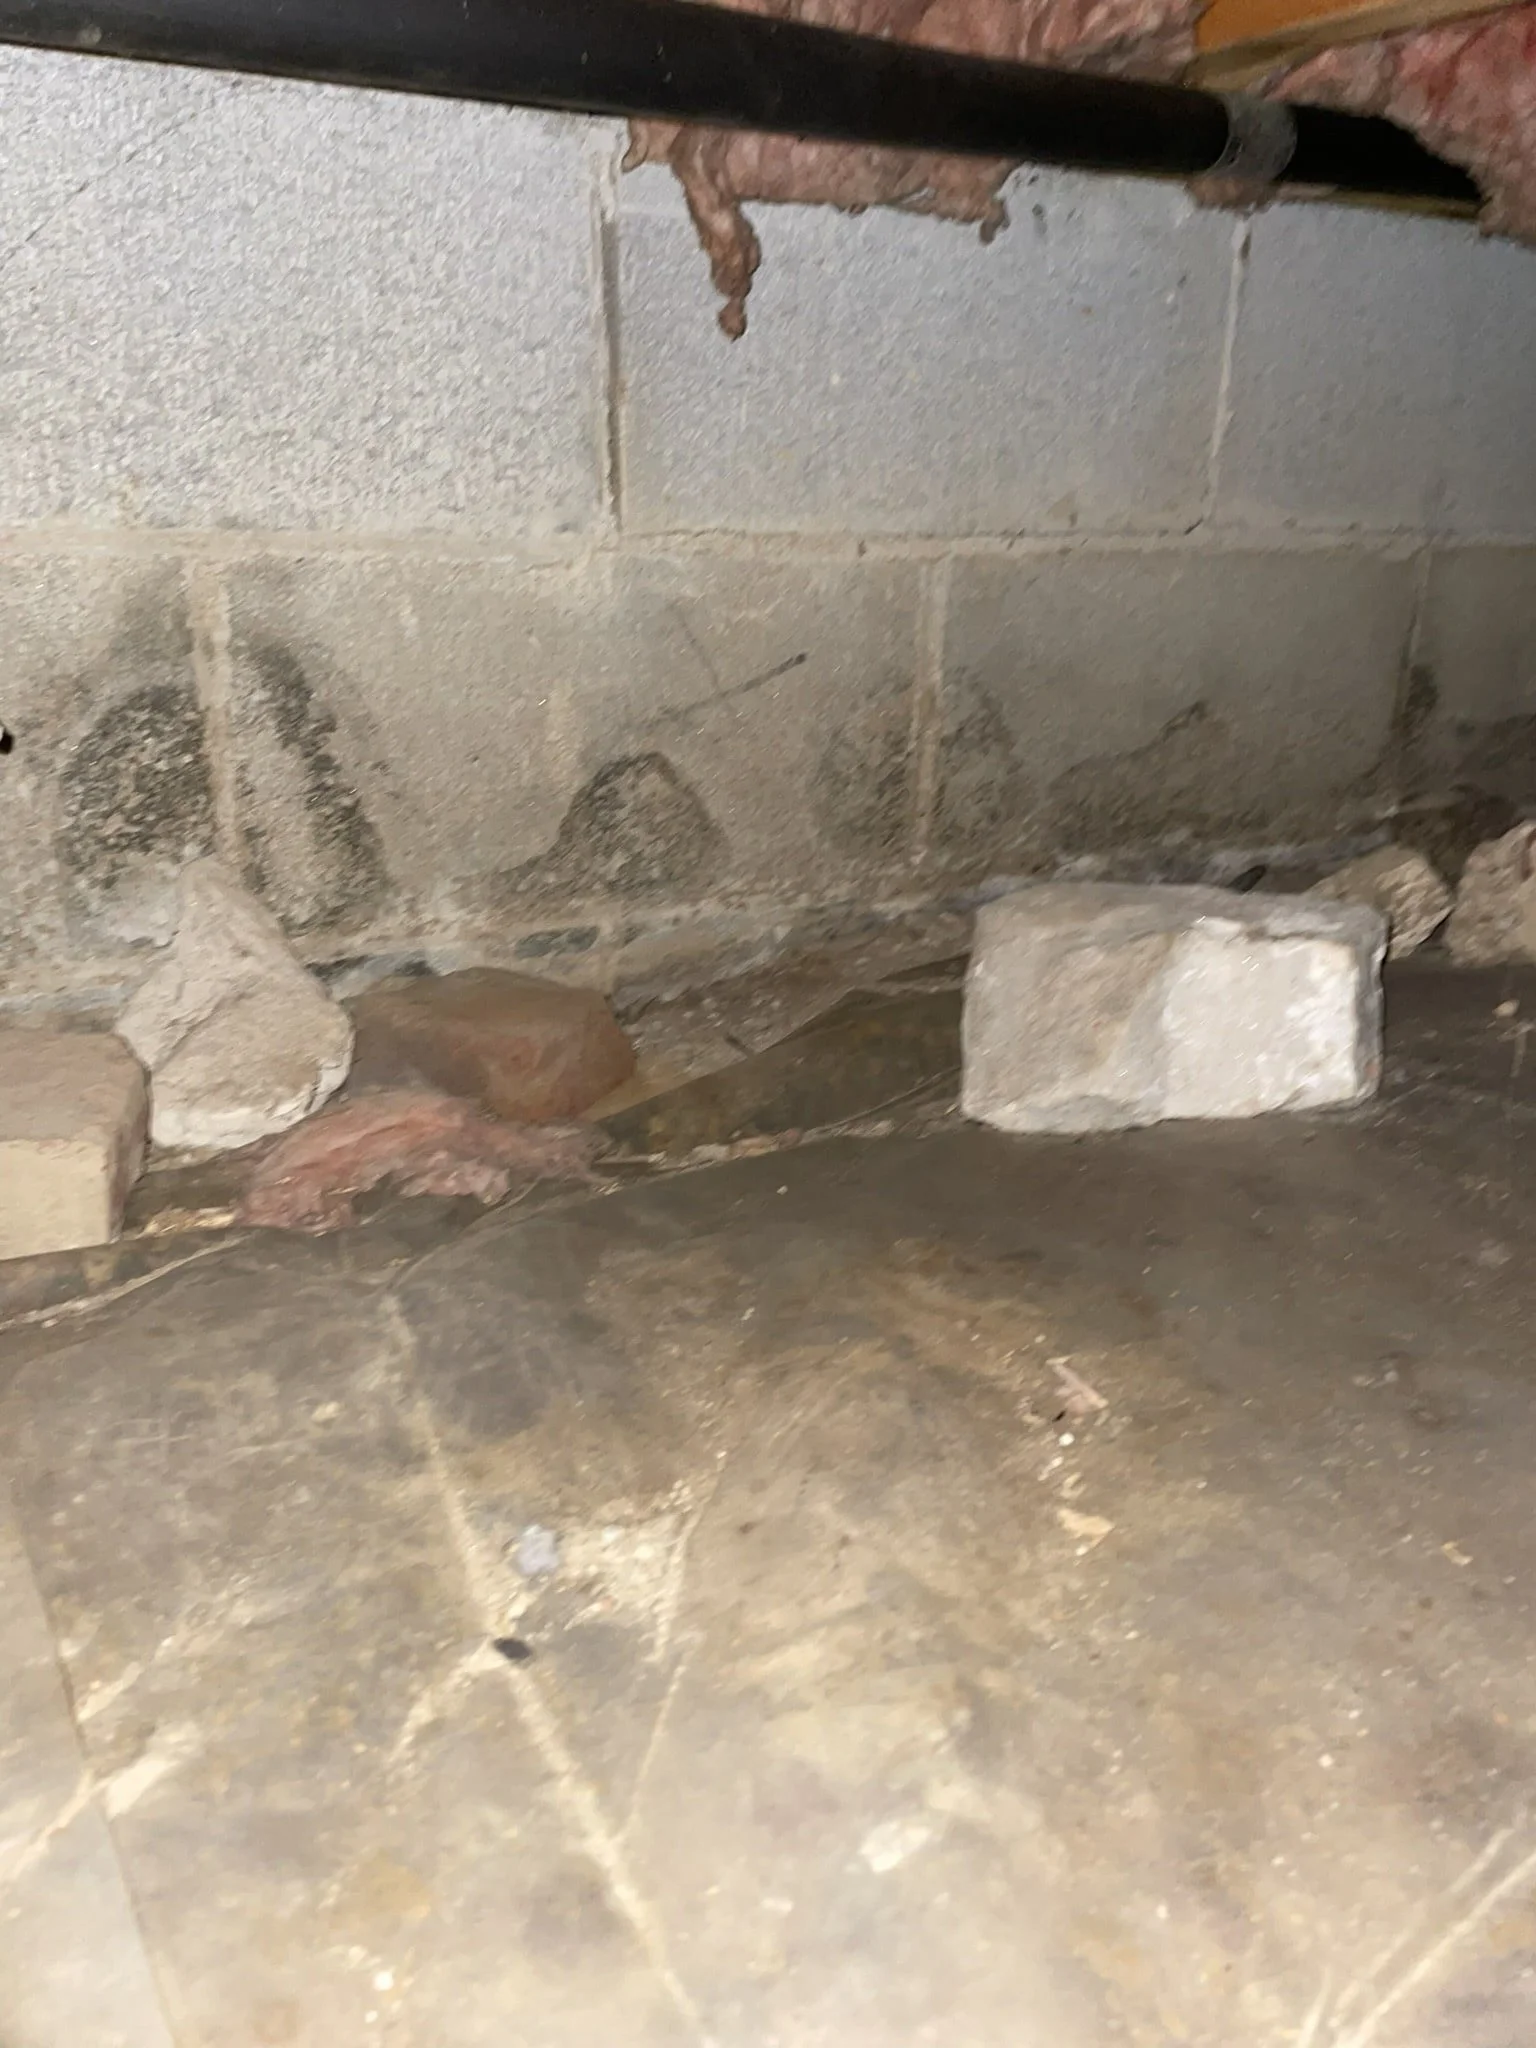
Along the perimeter of the crawl space, rocks have been placed in order to keep the vapor barrier pressed down. This is not an effective solution as the vapor barrier needs to be running up the walls at least 6 inches and sealed to the wall. Overall, the vapor barrier has been poorly applied.
Other opportunities to note.
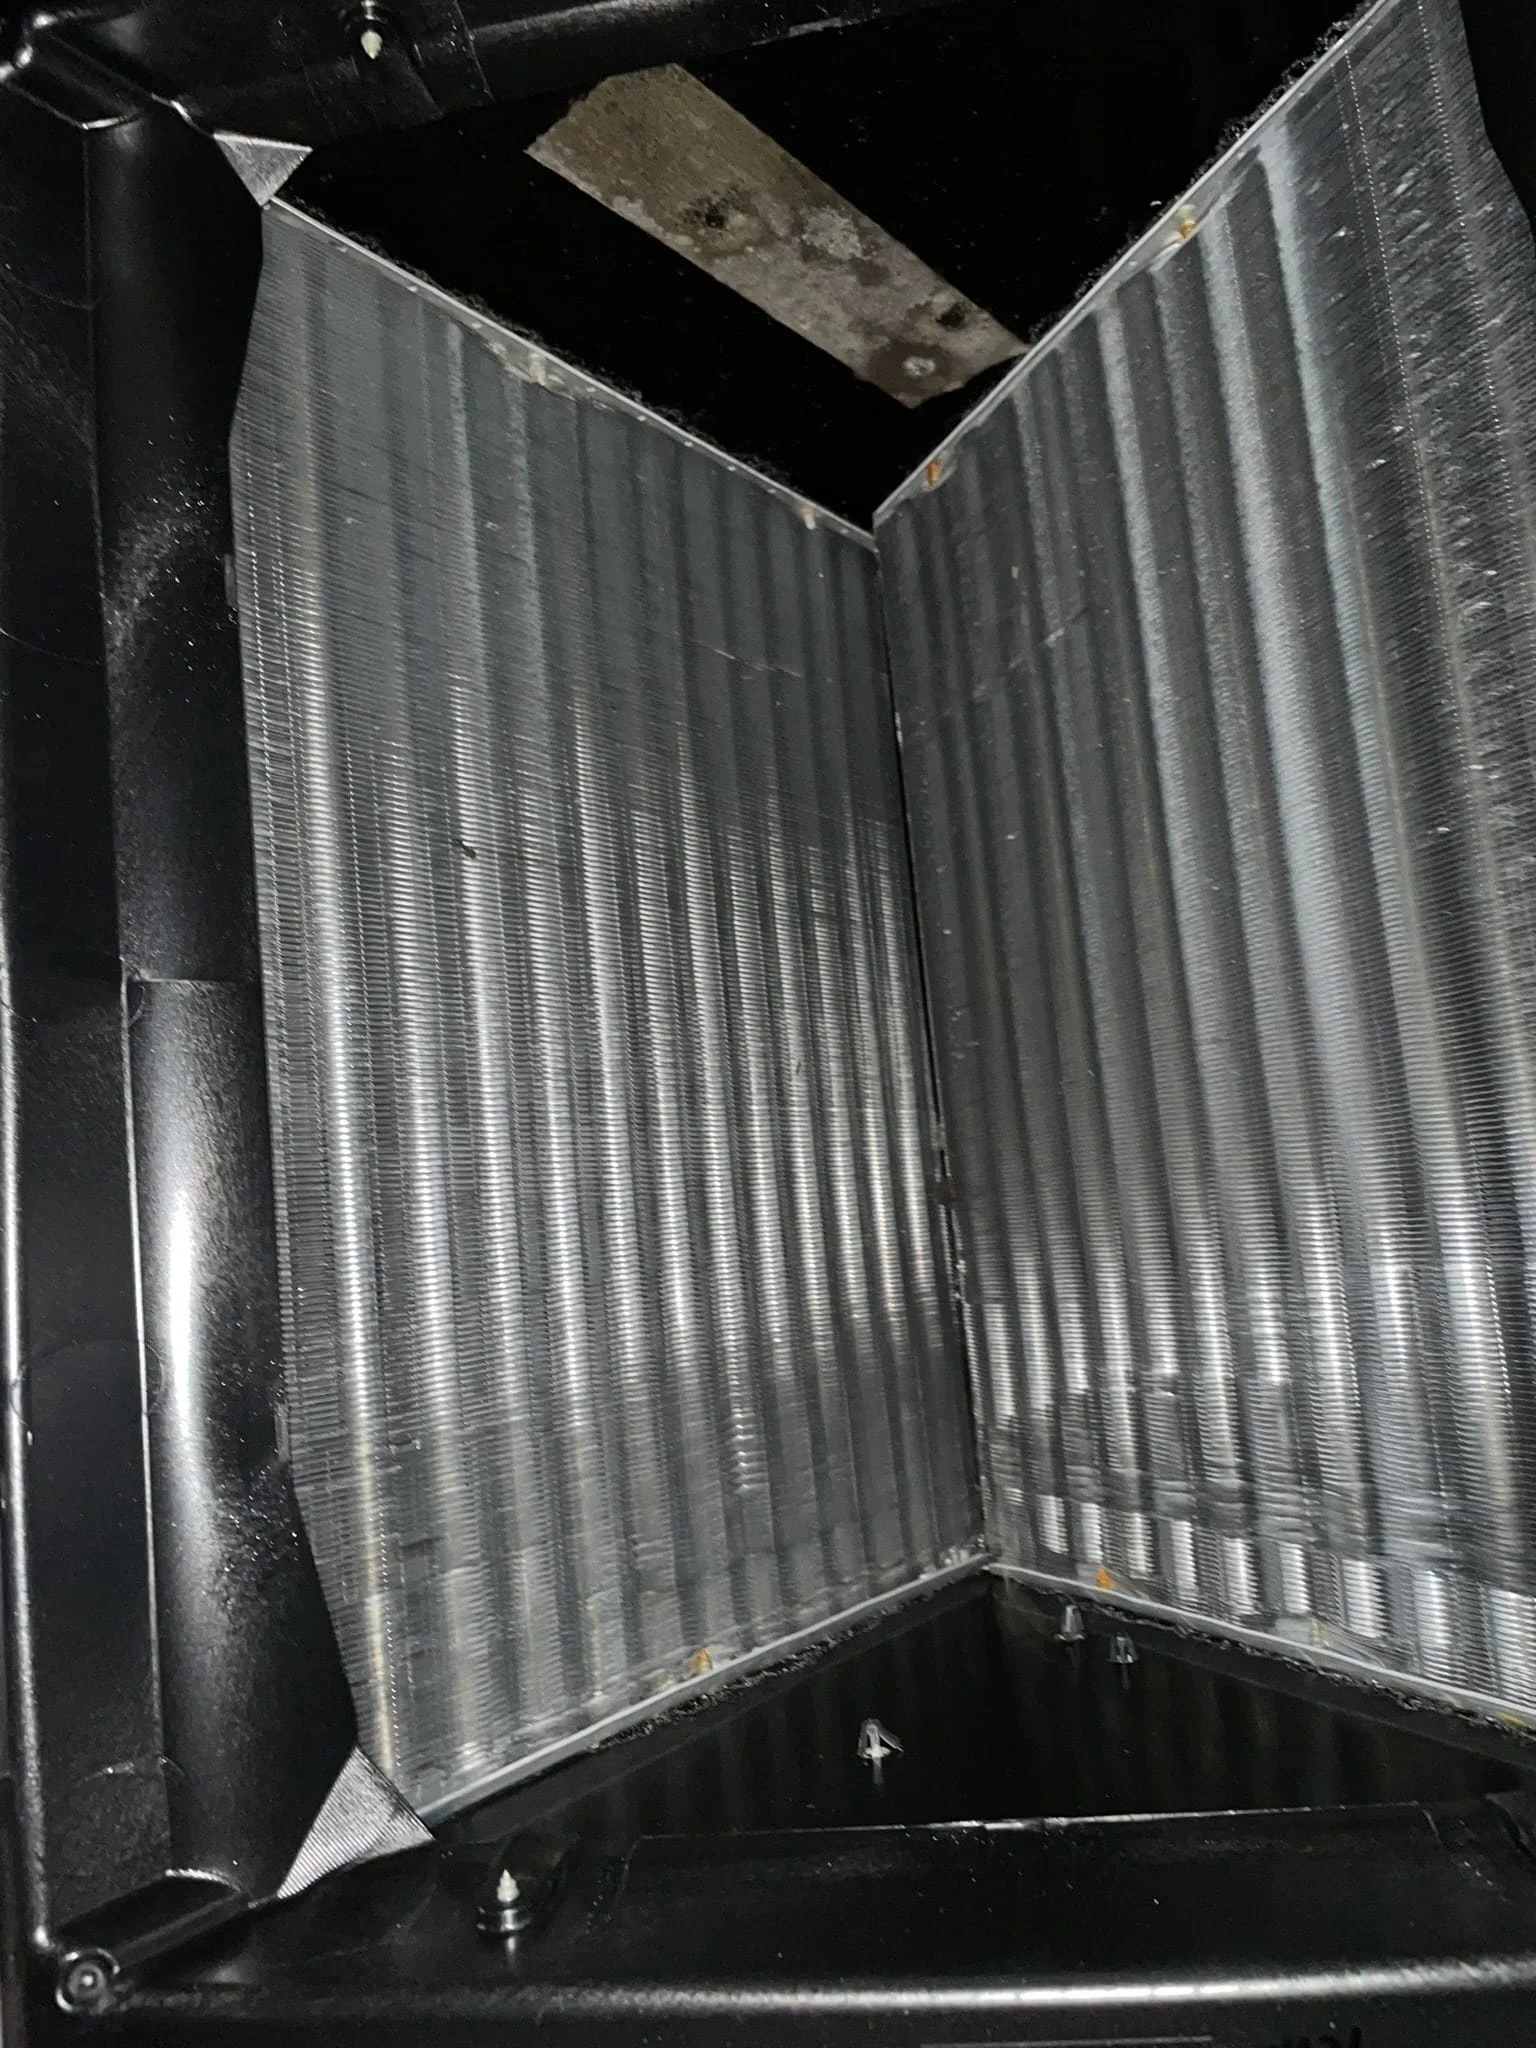
The filter on the basement air handler was temporarily removed so that the A Coil above could be inspected. This picture shows that it is very clean and is not a problem.

The radiator was found to not be working during an infrared inspection when the boiler was on. The radiator should be bright yellow.
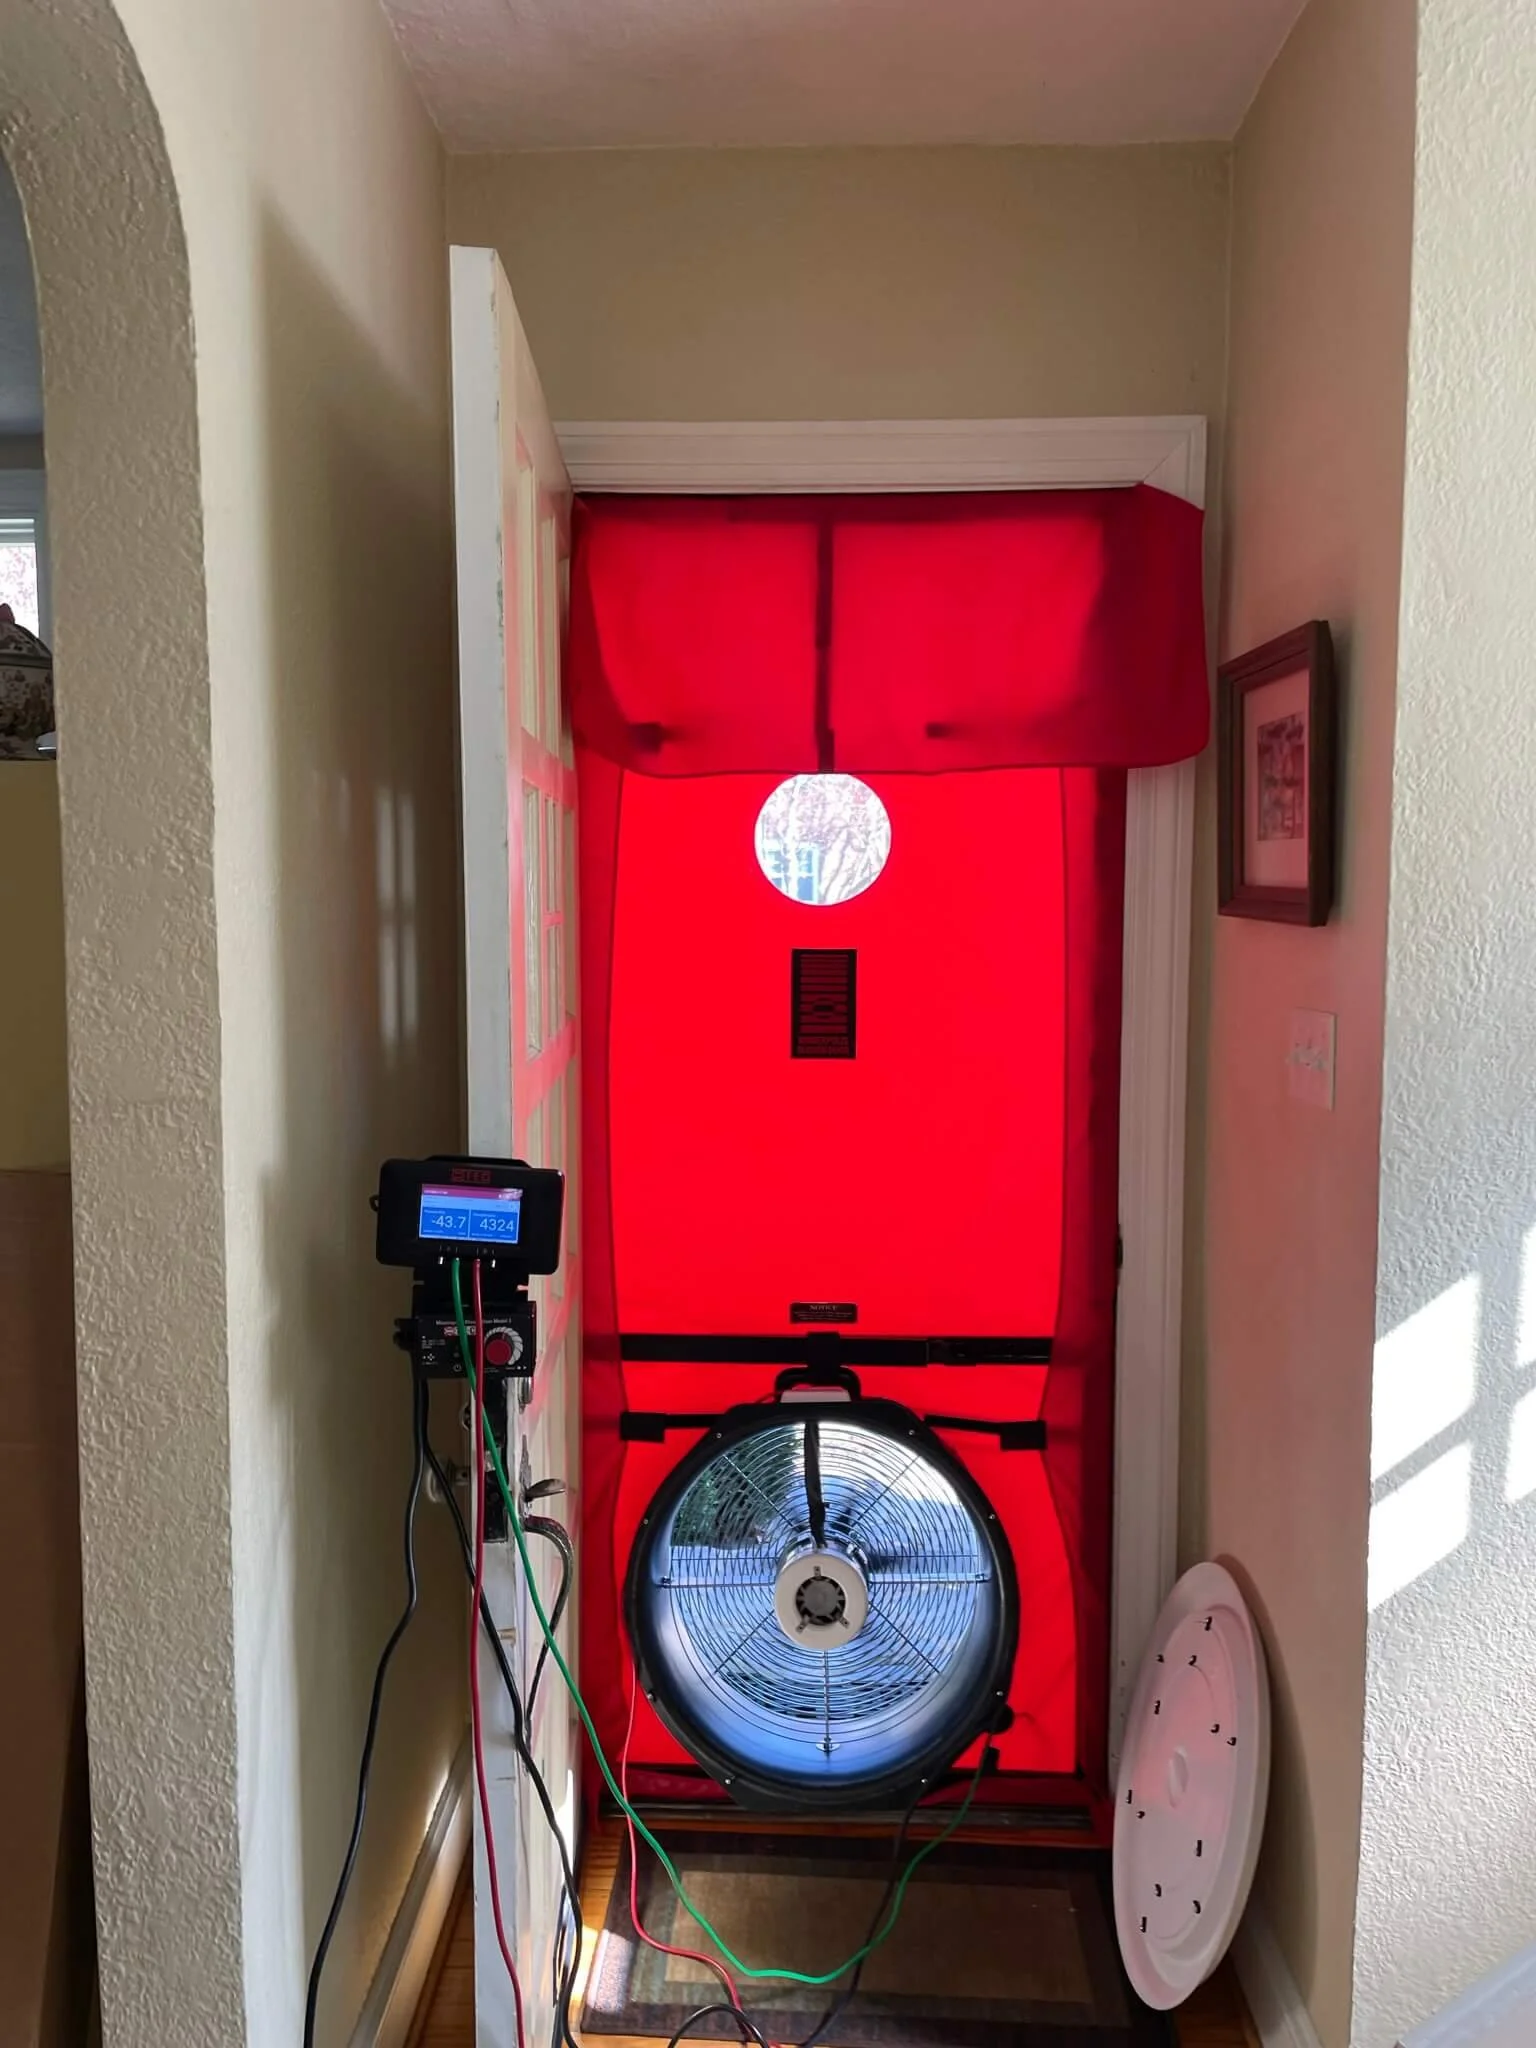
A blower door test was performed on the home and it was found to be 72% leakier than a new home built today. Making the home tighter will be a top priority.
Conclusion and Recommendations
The addition was poorly insulated, and sealed and the duct installation was done poorly. All of this creates inefficient distribution and retention of heat which in turn creates discomfort and higher energy bills. The main focus areas in order of importance are the addition attic, crawl space, and then the original attic.
Both attics should be sealed and insulated to R-49 using either fiberglass or cellulose insulation. The master bathroom exhaust fan should be vented out the back roof, and the ductwork should be shortened, and sealed using mastic.
The crawl space should be encapsulated using closed cell spray foam. This means applying the insulation along the exterior walls to bring the crawl space into the home’s conditioned area. This helps to make the ductwork much more efficient which will also get you a higher rebate. This will also greatly mitigate the infiltration of humidity into the home, reducing pests and improving indoor air quality. The existing vapor barrier should be removed so that a 10-millimeter vapor barrier can be installed along the floors and up the walls by 6 inches. Additionally, the ducts should be reconnected, shortened, and sealed using mastic.
These solutions don’t have to be done all at once but these are the top recommendations for this home. You may be thinking that several other options weren’t mentioned, such as walls, windows, or the basement. These weren’t mentioned because they have so little cost effectiveness that it's not worth considering.
If you are interested in learning more about your home and what you can do to make it more comfortable, efficient, and safer then schedule an energy audit with Smart Energy Pros today!